Your Guide to Podcast Studio Setup (+5 Budget-Friendly Hacks)
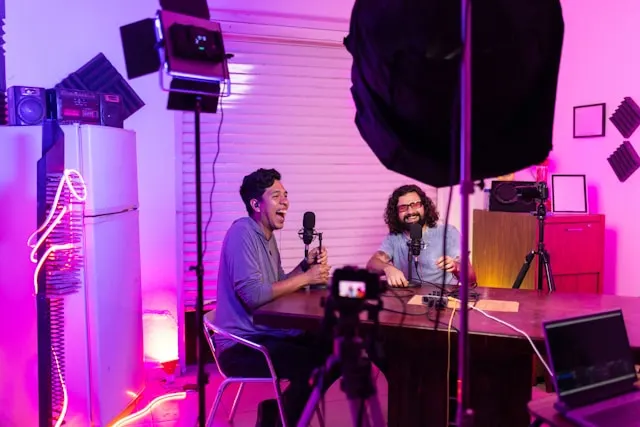
The right environment can significantly transform the outcome of your work, which explains why a well-designed podcast studio setup matters a lot. It will not only provide a smooth workflow but also inspire productivity and creativity during sessions.
In this blog, we will:
- Share a podcast studio equipment list, including both essentials and optional items
- Guide you through the steps on how to set up a podcast studio, including tips for video podcast setup
- Highlight 5 budget-friendly podcast studio setup hacks
Let's get started.
Podcast Studio Equipment List
Before we explore the “how” of setting up a podcast studio, let’s break down the equipment you’ll need, including both the must-haves and nice-to-haves.
Essential Podcast Equipment
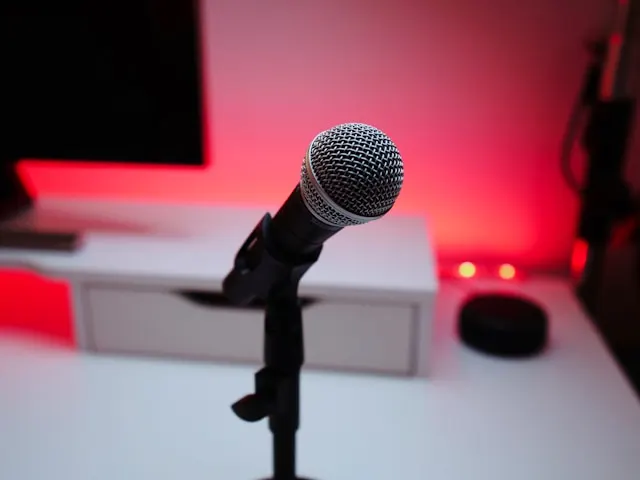
- Microphone: This is the core gear of any podcast studio setup. While USB microphones are ideal for beginners as they’re easy-to-use, XLR microphones are preferred by professionals due to their superior sound quality and versatility. Keep in mind that XLR mics require an audio interface for connection.
- Headphones: Closed-back headphones are recommended for podcasting. They not only prevent sound leakage but also allow you to hear your voice without interference. Seek comfortable and durable models that can be worn for extended periods as podcasting can involve long recording and editing sessions.
- Recording and editing software: Used for capturing and editing audio, the right software will allow you to record and polish episodes seamlessly. Popular options include Audacity (which is free and great for beginners) and Adobe Audition (which is a professional digital audio workstation). You can also use Spotify for Podcasters, which enables recording and editing both audio and video episodes.
- Camera: A high-quality camera is very important if you’re creating a video podcast. While using your smartphone or a webcam is more budget-friendly and straightforward, DSLRs and mirrorless cameras come with superior image quality. Evaluate factors like resolution, frame rate, and low-light performance when making your decision.
Optional Podcast Equipment
- Audio interface: Serving as a bridge, an audio interface connects XLR microphones to your computer and converts analog sound signals to high-quality digital audio. Look for interfaces with multiple inputs if you plan to record with more than one microphone or instrument.
- Audio mixer: With an audio mixer, you can control and adjust multiple audio sources in real time. This is especially valuable for podcasts with multiple hosts or guests, as you can manage different microphones and sound levels effectively.
- Microphone stand: Positioning the microphone for optimal sound capture will improve the overall recording quality Boom arms are particularly useful as they allow for flexible placement and can be adjusted easily without taking desk space.
- Shock mount: The shock mount isolates the microphone from vibrations and handling noise. While many microphones come with their own shock mounts, upgrading to an aftermarket shock mount can enhance your podcast’s sound even more.
- Acoustic panels: These can reduce echo and background noise in your podcast studio setup. You can mount the panels on walls and the ceiling to absorb sound waves, preventing them from bouncing around the room.
- Pop filters: A pop filter reduces plosive sounds (“p” and “b” cause bursts of air that can distort audio) in your recordings. Simple yet effective, it acts as a barrier between the mouth and microphone to diffuse the air pressure before it hits the mic.
- Lighting equipment for video podcasts: If you’re shooting a video podcast, good lighting equipment will eliminate harsh shadows and create a professional look on camera. Softbox lights and ring lights are popular options for illuminating your podcast recording space evenly.
Don’t Forget an AI Transcription Software
How to Set Up a Podcast Studio in 3 Stages
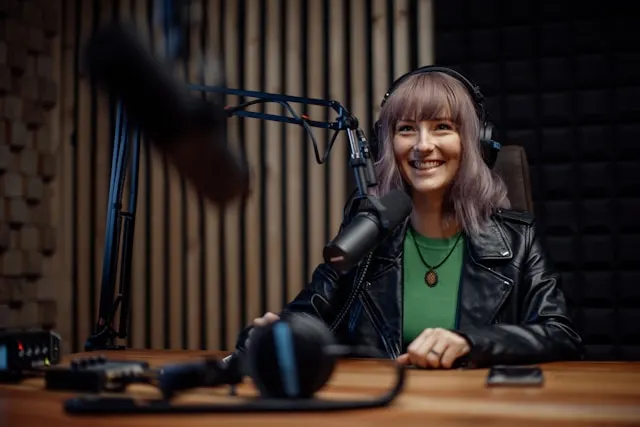
Whether you’re creating a podcast from your home or a dedicated space, the setup process can greatly impact your recordings. Here’s a three-stage guide for an effective podcast studio setup:
Choose Your Space
When choosing the space for your podcast studio, prioritize a quiet environment with minimal external distractions. Avoid spaces near windows, streets, or high-traffic areas that can lead to unwanted noise. A room with soft surfaces like carpets can reduce echo and improve overall sound quality.
The space must offer enough room for your equipment and any co-hosts or guests. Check if there are enough electrical outlets to power all your equipment. Lighting and ventilation are also important, especially if you plan to spend long hours recording.
Set Your Equipment and Environment
Keeping everything ready and organized is crucial for a smooth recording process. Here is how you can set the equipment and environment for your podcast room:
- Have a comfortable and functional desk that has enough surface area to accommodate your equipment. An ergonomic chair is equally important to prevent back strain and maintain a relaxed posture while speaking.
- Install your preferred software and configure it to record in the desired format. WAV or MP3 format at 44.1kHz will be suitable for podcasting.
- Place your microphone on a stand or boom arm. The ideal microphone placement may vary depending on your voice and recording style, so experiment with different distances and angles to find what sounds best. If you’re using a boom arm, ensure it doesn’t block your view or restrict movement.
- Secure your microphone in the shock mount. Then attach the pop filter 1-2 inches in front of the microphone.
- If you’re using an XLR microphone, connect it to the audio interface. Adjust the input levels and aim for green signals without turning red.
- Plug your headphones into the audio interface or computer for real-time monitoring.
- Position your audio mixer on a stable surface close to your other equipment for easy access. Connect all audio sources to the mixer and label each channel to keep track of different sources. Route the output to your audio interface or computer for recording.
- Mount acoustic panels on the walls or ceiling. Focus on areas directly in front of your recording space and behind your microphone for the most impact.
Test Carefully
Testing in advance will save time and prevent technical issues during the actual recording. Begin by putting on your headphones and speaking into the microphone at the volume you plan to use during the recording. Check your recording software to monitor the input levels. If the levels are too low or too high, adjust the settings on the software or the audio interface or mixer if you’re using one.
Next, record a test clip lasting 30 seconds to a minute. Play it back to evaluate the audio quality, and make any necessary adjustments to your microphone position, input settings, or acoustic treatment until you achieve the desired sound.
50 Great Podcast Ideas for Beginners in 2025
Video Podcast Studio Setup: Additional Steps
What if you’re shooting a video podcast? The following additional steps will elevate your podcast studio setup for an enjoyable viewer experience.
Arrange Your Background
An appealing background will not only engage viewers but also showcase the personality and theme of your podcast. This could be a bookshelf or a dedicated backdrop that reflects your brand.
You might also add decorative elements such as an artwork or props to add personality. However, avoid clutter, as it can distract viewers from the conversation.
Adjust Lighting
Proper lighting can significantly improve the video quality. Strive for a three-point lighting setup: key light (the main light), fill light (to soften shadows), and backlight (to create depth). Experiment with brightness and positioning to achieve the best look. Softboxes or diffusers can help you avoid harsh shadows on your face.
You can also utilize natural light by positioning your recording space near windows. However, be mindful of the changing light conditions throughout the day as well as background noise from outside.
Try Different Camera Angles
Position the camera slightly above eye level to draw the audience’s attention to the speakers. Maintain consistent framing across shots to ensure a cohesive look, and don’t hesitate to adjust the angles to highlight key moments or reactions.
If possible, use multiple cameras: one for a wide shot and another for close-ups. This setup will allow you to capture the emotions and reactions of hosts and guests more precisely. Additionally, over-the-shoulder shots can immerse viewers in the conversation, making them feel like part of the podcast.
Insert Branding Elements
Branding elements in your podcast studio setup can reinforce your show’s identity. Simple touches like a logo on a coffee mug, custom wall art, or branded products on your desk can definitely make an impact. Position them where they’re most visible on camera.
Using consistent color schemes will also help make your studio an extension of your podcast’s unique presence. You can select a palette that complements your podcast cover art and incorporate it into your furniture or decor.
5 Budget-Friendly Podcast Studio Setup Hacks
You don’t need expensive gear to build your podcast room. Before we conclude our blog, we’ll share 5 practical tips for a cost-effective podcast studio setup.
- Compared to more pricey options, a USB microphone can do the job without breaking the bank. Pair it with a free podcast editing software to create episodes without a high financial investment. When it comes to video podcasts, your smartphone can be a budget-friendly option for recording or serving as a secondary camera.
- Improving sound quality doesn’t necessarily mean investing in acoustic panels. You can create a DIY solution with items you already have at home. Blankets, rugs, or foam can absorb sound and reduce echo. Use them to cover hard surfaces, which tend to reflect sound and cause echoes.
- For video podcasts, desk lamps or floor lamps can be adjusted to mimic professional lighting setups. Use soft and warm light bulbs to eliminate harsh shadows and create a clear, flattering look on camera.
- Second-hand markets or online marketplaces can be a goldmine for finding affordable podcast gear. Popular options include Letgo, eBay, and Amazon Resale. Plus, it’s environmentally friendly to reuse equipment that’s still in good condition.
- Collaborating with fellow podcasters can be a smart way to cut down on expenses. You can share equipment like cameras, microphones, or editing software to reduce individual costs. (This can extend to content creation; for instance, cross-promotion or guest appearances can increase your podcast’s exposure without additional costs.)
Frequently Asked Questions
Do you need a studio to do a podcast?
You don’t need a professional, dedicated studio to do a podcast. In fact, many successful podcasters record from their homes or other informal settings. Yet wherever your podcast studio setup is, make sure you maintain a comfortable environment that fosters natural conversation, and implement sound treatment practices to enhance audio quality.
How big should a podcast room be?
This depends on several factors, including the number of hosts and guests, as well as the equipment being used in the podcast studio setup. For solo or duo podcasts, a room as 10×10 feet (9 m²) can work. Meanwhile, a room of around 12×15 feet (16 m²) or larger is better for podcasts with more hosts or guests.
What is the best flooring for a podcast room?
Carpet and cork flooring are top choices for a podcast room. Both options are great sound absorbers and can reduce echoes. However, avoid high-pile carpets as they can trap more dust and allergens, and ensure the cork is treated against humidity to maintain its durability over time.
What is the height of a podcast table?
For a professional podcast studio setup, it’s better to stick with standard table heights, which range from 28 to 30 inches (71 to 76 centimeters). This will accommodate most chair heights, making it easier for everyone to participate in the conversation comfortably. Adjustable height tables can also be a great option, as they allow you to customize the height to guest preferences.
How to Start a Podcast with No Audience in 3 Stages
Summary
This blog covered how to set up a podcast studio for both audio and video podcasts, and listed the equipment you’ll need during this process. It also shared 5 budget-friendly podcast studio setup hacks that can optimize your podcast quality without breaking the bank.
Here are our 3 golden rules for a successful podcast studio setup:
- A quality USB or XLR microphone, a good set of headphones, and reliable recording and editing software are the essential items you need.
- Choose a location that is quiet and free from interruptions caused by external noises.
- Test your equipment and space before the actual recording session to prevent any issues later on.
Now you’re ready to record in a well-prepared podcast studio setup! Seat comfortably and have your script or talking points easily accessible. Don’t worry about making small mistakes (you can always edit the recording later) and enjoy the ride.