Open Captions vs. Closed Captions
Captions play an essential role in making media content accessible to diverse audiences, from those who are deaf or hard of hearing to multilingual viewers. Captions also aid in environments where audio cannot be heard, like noisy public spaces or quiet zones. But not all captions are created equal; they come in two primary types: open captions and closed captions. Here, we’ll dive deep into their differences, purposes, and best-use cases to help creators make informed decisions about captioning their content.
What Are Captions?

Before delving into specifics, let’s briefly clarify what captions are. Captions provide a textual representation of audio content in a video, including dialogues, speaker identifications, sound effects, and music cues. By conveying these audio elements in text, captions make videos accessible to people who may not be able to hear or understand the spoken language due to various reasons.
Technical Differences Between Closed and Open Captions
| Aspect | Open Captions | Closed Captions |
|---|---|---|
| Visibility | Always visible | Optional, can be toggled on/off |
| File Type | Part of video file | Separate caption file (e.g., .SRT, .VTT) |
| Platform Support | Works on all devices and platforms | Depends on platform/device support |
| Editing | Requires re-editing video | Editable through caption file |
| Viewer Control | Fixed display, no user customization | Users can adjust visibility and often styling settings based on platform |
| Multiple Languages | Not easily supported; requires different video versions | Can support multiple languages with separate files |
The Two Types of Captions: Open vs. Closed
1. Open Captions
Open captions are also known as "burned-in" or "hard-coded" captions. They are permanently embedded in the video and cannot be turned off or removed by the viewer. They are part of the video file itself, which means they appear consistently on any platform or device where the video is played.
Characteristics of Open Captions:
- Permanent Display: Open captions are permanently visible and cannot be toggled off.
- Styling Control: Content creators can control the font, size, color, and position, which are then fixed in place for all viewers.
- No Additional File Required: Since they’re embedded directly into the video, no separate caption file is needed.
Advantages of Open Captions:
- Device Compatibility: Open captions work on any platform, app, or device without special support.
- Consistent Viewing Experience: Creators control the style and positioning, ensuring that all viewers experience the captions in the same way.
- Ideal for Public Display: Open captions are useful for situations like TV screens in public places, where viewers may not have control over caption settings.
Drawbacks of Open Captions:
- Inflexibility: Viewers cannot disable the captions if they don’t need them, which may impact the viewing experience for some.
- Editing Limitations: Any error in open captions requires editing the entire video to fix, which can be time-consuming and costly.
2. Closed Captions

Closed captions, on the other hand, are optional and can be toggled on or off by the viewer. This flexibility makes closed captions especially useful for streaming services, television, and online video platforms. Closed captions are usually delivered through a separate file (such as .SRT, .VTT, or .SCC) that can be loaded alongside the video, offering different levels of customization for viewers.
Characteristics of Closed Captions:
- Toggle On/Off: Viewers have the option to turn closed captions on or off as desired.
- Device & Platform Dependent: Closed caption functionality requires a platform or device that supports it, such as YouTube, Netflix, or modern TV setups.
- Separate File Dependency: Closed captions require a caption file that contains timing and text information for the captions.
Live Caption for Free
Advantages of Closed Captions:
- Viewer Control: Users can choose whether they want to see captions or not, catering to a wider range of preferences.
- Supports Multiple Languages: Multiple closed caption files can be attached to a single video, allowing viewers to select their preferred language.
- Easily Edited: Closed captions are editable without altering the video, so errors or updates can be corrected simply by editing the caption file.
Drawbacks of Closed Captions:
- Device Limitations: Closed captions may not display properly on all devices or platforms, especially older ones.
- Style Restrictions: Platforms like YouTube or Netflix often control the look of closed captions, limiting creators' control over their appearance.
- Reliance on Technology: Closed captions may fail to load or sync correctly if the platform or device doesn’t support the file format, which can lead to inconsistent accessibility.
Which One Should You Use?
Use Cases for Open Captions:
- Public Displays and Events: If your content is being played in public spaces where users can’t control the captions (e.g., airports, restaurants, conferences), open captions are ideal.
- Platforms with Limited Caption Support: Some social media platforms and older devices don’t fully support closed captions, so open captions guarantee accessibility.
- Language-Specific Content: If you want to ensure that all viewers see the same language for a particular target audience, open captions are useful.
All Subtitle Formats: Which to Use & Why
Use Cases for Closed Captions:
- Online Streaming: For platforms like YouTube or Netflix, closed captions provide flexibility for users to toggle captions based on preference.
- Multilingual Content: Closed captions allow users to select captions in their preferred language, broadening accessibility.
- Flexibility for Viewers: When viewers might prefer no captions or only need them occasionally, closed captions offer the best user experience.
Summary
Both open and closed captions have distinct advantages and limitations, each suited to different environments and audience needs. Open captions guarantee universal visibility but lack flexibility, making them well-suited for static public displays or platforms with limited captioning capabilities. Closed captions, while dependent on platform support, provide users with more control and customization, especially for multilingual or streaming content. Ultimately, the choice between open and closed captions should be informed by where and how your audience will consume the content, balancing accessibility with user experience to best serve the intended audience.
FAQ
What is the difference between opened and closed captioning?
- Open captions are embedded in the video and cannot be turned off by the viewer. They’re always visible.
- Closed captions can be toggled on or off, typically accessible through a CC button, providing flexibility.
What is an example of an open caption?
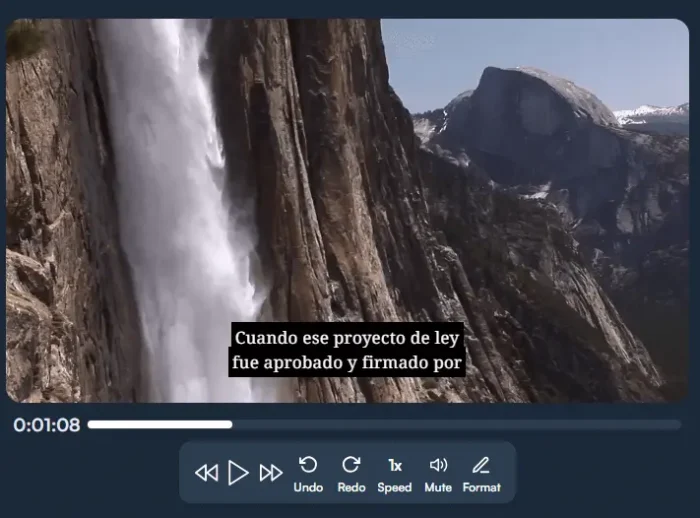
A foreign language film with hardcoded English subtitles is a common example of open captions; viewers can’t turn them off.
What's the difference between CC and subtitles?
- Closed Captions (CC) include dialogue, sound effects, and sometimes speaker identification to assist viewers with hearing impairments.
- Subtitles only translate or transcribe spoken dialogue, primarily for viewers who don’t speak the language but don’t need sound cues.
What is open subtitles or closed captions?
- Open subtitles are like open captions, embedded in the video and always visible.
- Closed captions are similar but can be enabled or disabled, offering additional audio details beyond just the spoken words.
What is the difference between OCAP and CCAP?
- OCAP (Open Captions):
- These captions are “burned into” or embedded directly in the video, meaning they are always visible to the viewer and cannot be turned off.
- Typically used in scenarios where the audience needs constant captioning, such as in social media videos or public screens without audio.
- CCAP (Closed Captions):
- These captions are optional and can be turned on or off by the viewer, typically using a “CC” button.
- Often preferred for TV broadcasts, streaming services, or other media where viewers may want the option to view or hide captions.
The main distinction is viewer control: OCAP is always visible, whereas CCAP offers the choice to enable or disable captions.
