How to Transcribe an Audio File to Text on Mac
For those who aren’t big on technology, transcribing audio can seem to be a tricky and tough task. Where do you begin, and which software do you use? Some of the software you used many years ago might not be available anymore. For example, if you learned how to transcribe audio using a QuickTime player, it’s time for an update, quick.
Put the early 2000s behind you and utilize current technology confidently. With our help, you can use MacOS Monterey to transcribe audio to text instantly!
Transcribe Audio to Text Live: Using Dictation
First, let’s cover the basics. Did you know you can easily turn live speech into text on Mac computers using the dictation feature? Here’s how to transcribe the audio as you’re saying or recording it:
- Go to System Preferences (or click the Apple icon)
- Click on “Keyboard”
- Hit “Dictation,” then select “On”
- Enable dictation and choose a shortcut if desired
- Open a document, use your shortcut, and start text transcription
If you’ve never used this handy feature, you’ll love how simple it is to get a transcript while recording. Before you create videos or podcasts, all you need to do is remember to turn on dictation and then hit “record.”
Take Advantage of AI Transcription
Transcribing Audio Files on Mac

Dictation doesn’t always help transcribe audio files to text. Mac computers may not pick up what’s coming through the speakers as you’re playing your audio. You’ll encounter the same issue when transcribing an audio file using Google Docs since it doesn’t recognize recorded audio. What should you do?
To transcribe audio to text, some people like to download drivers. Transcribing audio files is fairly simple using this option, but you have to be very careful about the driver you download. You’ll want to download a well-maintained and patched driver to avoid getting any viruses. (And yes, Macs can get viruses.)
There are a few driver options to convert recorded audio to text. Mac is compatible with Soundflower and Blackhole. However, you should use extreme caution if you don’t want to compromise your system. You’d need to bypass security measures if you want to go this route, so we can’t recommend it. Soundflower and Blackhole aren’t updated much, and there’s even an article about how dangerous BlackHole is.
Thankfully, we’ve got an option that allows you to transcribe files using the cloud. Keep reading!
How to Transcribe an Interview (with 12 Best Practices)
Transcribing Audio on a Video File
If your goal is to transcribe videos to text, YouTube has a built-in tool that can help. Transcribe your video file using it to make video or audio transcription easy.
Here’s how:
- Upload the video to YouTube (feel free to delete it afterward if you want)
- Find the video and click on the three horizontal dots on the right side of the video
- Click on them
- Select “Show Transcript”
- You’ll see the transcript on the right of the video
- Remove timestamps by clicking three vertical dots to the top right of the transcript window
- Select the text from the transcript, then copy and paste it into a text editor
Uploading a video can take a long time, making it a major drawback of this method. It’s also not very accurate, so you’ll need to go in and edit the transcript manually.
Alternatively, you can use a YouTube transcript generator to accurately transcribe YouTube videos using AI transcription technology, available in 125+ languages.
Google Docs Audio Transcription
Google Docs is another free alternative that almost anyone can easily use. If you have a Google account, then you already have access to Google Docs. If you do not have a Google account, you can sign up for one for free.
- Sign into Google.
- Go to the Google Docs website.
- Start a new document.
- Click on Tools.
- Click Voice Typing.
- Click the Microphone icon on the left.
- Play your video or audio file.
Much like Apple’s dictation, Google docs voice typing is not the most accurate solution. It’s very accessible, but you can count on needing to edit and re-format the transcription extensively.
Use a Smartphone

If you have a smartphone, you can use its microphone, speakers, and a word processing app to transcribe audio. Although it can be a bit cumbersome, this method can get the job done.
- Open a word processing app on your smartphone.
- Select the Microphone button on your smartphone’s keyboard.
- Hold your smartphone to the speakers where your audio will play.
- Your smartphone should automatically transcribe the audio to text.
Get More Accurate Transcriptions with Maestra
Want accurate transcriptions that won’t require you to become a text editor? Maestra is the answer! We use AI and speech recognition to convert audio to text. Our transcription services aren’t even thrown off by background noise.
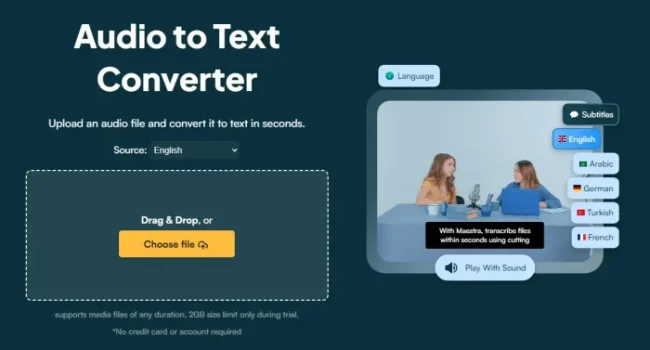
Here’s how to transcribe an audio file on Mac computers using Maestra:
- Upload the file
- Choose the audio language
- Your file automatically converts to text and is ready for download in minutes
Maestra enables you to export your transcript to the cloud, making it easier than ever to convert recorded audio to text. Mac users can rest at ease knowing that the software is completely secure.
Using a Mac to transcribe an audio file with Maestra sounds simple because it is. You can start for free or request a demo today!
FAQ
Can I convert an audio file to text on a Mac?
Yes, you can convert an audio file to text on a Mac using third-party transcription tools like Maestra’s AI transcription tool, which allows you to upload audio files and get accurate transcripts.
Does Mac have built-in transcription?
No, Mac does not have a built-in transcription tool specifically for converting audio to text. However, macOS includes voice dictation which allows you to convert voice to text.
How do I transcribe audio to text?
To transcribe audio to text, you can use an AI transcription service like Maestra. Upload your audio file, select the desired language, and the tool will automatically convert the audio to text.
How to transcribe audio in Word on a Mac?
Microsoft Word for Mac includes a “Transcribe” feature in the latest versions under the Dictate option, which allows you to transcribe audio.
Does Mac have an audio converter?
No, Mac does not have a built-in dedicated audio converter. However, you can use the Apple Music app (previously iTunes) to convert certain audio files into formats like MP3 or AAC. For more advanced conversions or file format options, third-party apps like Audacity or Maestra’s AI transcription tool can be used to convert audio to text or other formats.