11 Ways to Repurpose Video Content
No matter if video making is a passion or profession for you, there are times when you may to repurpose your pre-existing content. Repurposing content is not new and is used frequently by many influencers, businesses, corporations, and TV/film social media accounts. In this blog post, we will dive into the ways to repurpose video content.
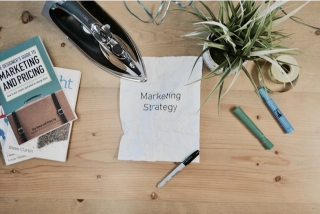
Why Repurpose Video Content?
Content repurposing can be a key part of any marketing or social media strategy. You can make great use of your video content by repurposing it in both creative and meaningful ways, while still creating a new piece of content.
There are 3 main reasons to repurpose video content. These 3 reasons keep your target audience and intentions in mind, while still expanding your outreach.
1. Save Time on Content Planning/ Creation
Repurposing your videos can be a major time saver. Creating new content is an arduous process, and certain types can take an extremely long time to plan and create from scratch.
Breaking up long videos into smaller chunks can save you effort in creating an entirely new piece of content that may fulfill a similar purpose.
For example, take a section of a video that you have, add subtitles to it, and then post it as an Instagram Reel or onto your Instagram Stories.
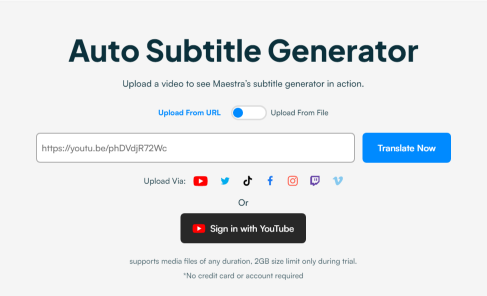
With tools like Maestra’s subtitle generator, you can save time and energy by adding subtitles to your existing video and have it ready to post to your social media channels in just a few minutes.
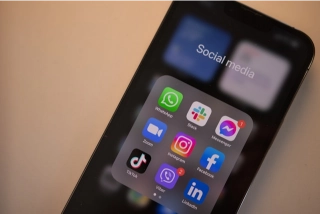
2. Increase Your Reach
Not all of your audience will be only on one platform. If you only make and post content on one or two channels, you may be missing out on relevant audiences. When you repurpose video content into other media forms, you can post tailored content to all your key channels.
Using snippets of clips can serve as a great video marketing tool. Send video ads to your different channels to promote your main channels or original pieces of content.
Not only is this great for businesses, but this strategy can also help content creators. It is a great way to attract an audience if you make YouTube videos or become a vlog/blogger.
3. Create a Consistent Brand Image
By repurposing your blog content, you can also share a consistent message across all of your social media platforms.
Consistency is key in all forms of content creation and creates a connection between you and your audience. It ensures they recognize your brand on any platform and helps establish credibility.
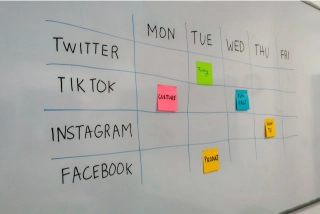
How often you should post varies, but it depends on the amount of content you are investing in, the channels you are populating, and what you intend the purpose of your content to be.
How to Repurpose Video Content in 11 Ways
These 11 popular ways to repurpose your video content are certainly worth including in your content strategy.
1. Create Shorter Videos for Social Media
You can turn any video you have into a social media post simply by sharing the same content in multiple places (of course depending on the time limit, size file, platform, etc.). This may require you to adjust the aspect ratio for some platforms.
For example, you can easily take a TikTok and turn it into an Instagram Reel, a story highlight, or a YouTube Short.
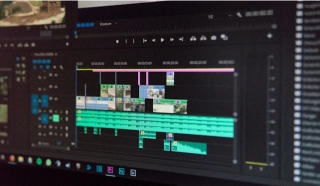
If you initially created a longer video for YouTube, then you can trim it into shorter segments and use those for several social media posts. Short videos are even easier to transform into popular posts for several social media channels.
Another technique you can use, depending on the kind of content you create, is to turn an explainer video into a silent, fast-paced video. The new video follows the same steps but is shorter and without audio.
2. Create Teasers to Promote Your Upcoming Video
As we've already mentioned, it is easy to convert long videos into shorter social media videos. This saves you a lot of time creating new videos promoting the original one.
These promotional videos can be compilations of moments from pre-existing content or a small clip from a particular piece of content to attract folks.
While doing this, a good strategy is to choose a moment that is either funny or emotional to pull an audience in.
Don’t forget to use a subtitle generator to assist in making content easy to understand and accessible.
3. Upload on Multiple Channels
If you have a YouTube page or are a rising TikTok star, using videos that are easy to post to multiple channels can be beneficial.
Therefore, plan for several channels when you create the video. Keep length restrictions and performance tips in mind while cross-posting.
For example, you can use a YouTube video on a landing page to help draw an audience in. You can also include videos from other channels within blogs, on your website homepage, etc.
4. Turn It Into a Blog Post
To repurpose video content, you can also turn them into blog posts. After transcribing the video, it’s very easy to edit and turn the transcription into a blog.
The good news about this is that you don’t have to transcribe your video on your own!
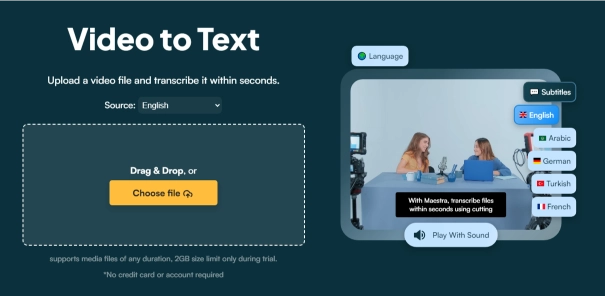
Maestra’s video-to-text converter generates a transcript of your video that is easily downloadable and shareable.
This strategy works really well for explainer videos (walkthroughs and demos), vlogs sharing stories that are engaging, and reviews for other properties (books, TV shows, movies, etc.).
5. Turn it Into a Podcast
Podcasts are some of the easiest content to both create and repurpose, especially if you already have videos to work from.
If you already have a video (or video series) you can easily edit them into a podcast that uses video or only audio.
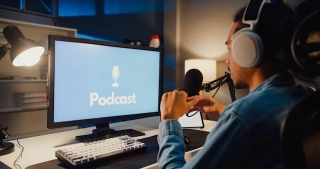
Turning your video into a podcast is a great way to reach podcast listeners and promote your brand on a huge platform.
It’s a very simple way to repurpose video content, and it is especially useful for longer-form video content.
6. Create Text-Based Posts
An AI-driven video-to-text converter can also be used for transcribing specific sections of video as well as the full video. The transcription sections can be cut down and used as other social media posts.
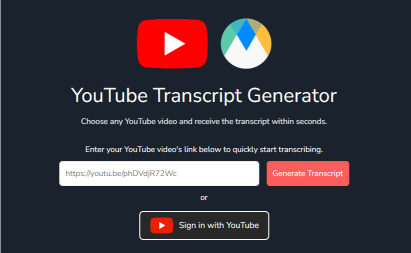
It is especially easy to transcribe your YouTube videos and then turn the transcription into text-based content for LinkedIn or X.
7. Extract Quotes
You could also take quotes that stand out from the transcription and turn them into social media graphics.
Overlay the quote (a statistic, fact, powerful insight, etc) on a branded image and post to Instagram, LinkedIn, Facebook, etc.
7. Share Behind-the-Scene Content
Sharing how a video was recorded and funny bloopers that were left out during editing are great ways to engage your audience with their authenticity. Not only does this kind of content add variety but also provides a compelling storytelling aspect.
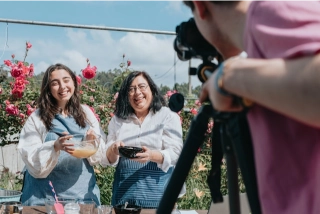
Showing the funny mistakes behind the well-produced videos demonstrates transparency, builds trust, and humanizes your brand.
Seeing the teamwork behind a video is also a great way for your audience to build emotional connections.
8. Create Monthly Recap Videos
Recap videos are highly engaging content forms. Whether you are a long-form or short-form video creator, you can bring together highlights or summaries of your previous videos and create a video documenting what you've been up to.
While combining clips, you can add captions or voiceovers to make sure that the story you are presenting resonates with your audience.
Luckily, Maestra has a solution for that too. You can generate voiceovers and captions in 125+ languages without hassle.
9. Make GIFs or Memes
GIFs and memes are perfect for introducing humor and building relationships. Sharing what is funny to you is a way of showcasing your personality.

GIFs are easily consumable because they require a very small attention span. They are a huge part of pop culture, and they drive engagement.
10. Create Sharable Educational Materials
If your video is a tutorial or includes informative parts, you can use those parts to create informative materials for your audience to benefit from and share.
You can create visuals demonstrating instructions about how to do something, or you can create bite-sized clips to appeal to your audience.
11. Modify According to Trends
As a content creator, you should always be following the trends. So, you can change the sound effects or visuals you've used according to the trends.

When a trend goes viral, you can add new commentary to older videos related to that trend and share it as a throwback post too.
Key Takeaways
From one video, you can create several different types of content. When you repurpose your video content into high-quality content, you can generate posts for several social media channels and marketing purposes.
- This is the best way to save time on content creation and content marketing since it helps you make the most of the videos you've created.
- Maestra makes it easy for you to repurpose your content in a creative way.
- Various tools such as the video-to-text converter and the subtitle generator that Maestra provides work to make your life easier and your content creation and sharing experience as seamless as possible.
Frequently Asked Questions
What does repurpose video content mean?
Repurposing video content means that the existing material is being modified so that it can be used in different formats and platforms. This maximizes the value od your content and saves you a great deal of time while content creating and planning.
What is an example of repurposed content?
Posts you see every day can be an example of repurposed content such as blog posts that are created with the transcriptions of video content, infographics, podcasts, and social media snippets.
When should you repurpose content?
You should repurpose video content if you want to share it on different platforms. Each platform has different formats and users. So, you need to make sure that your content is compatible with the platform’s requirements and the users of that platform will enjoy that content.
You should also repurpose your video content if you want to maximize its value, reach a wider audience, and save time while sharing various posts consistently.