How to Start Streaming on Twitch with OBS (Beginner’s Guide)
If you love gaming or any other creative pursuit, Twitch is an ideal space to express yourself and share your passion with like-minded individuals. Its dynamic format (such as live chat engagement and real-time audience reactions) makes streaming exciting and rewarding, as you can experiment and evolve alongside your community.
In this blog, we’ll focus on how to start streaming on Twitch for beginners, including:
- What Twitch is and why it’s popular
- The equipment and software you’ll need for streaming on Twitch
- How to set up OBS for Twitch streaming
- Best practices for becoming a streamer on Twitch
Let’s get started.
What is Twitch?
Twitch is one of the leading platforms for live streaming, attracting millions of viewers daily. The platform provides interactive features such as live chat, emotes, and monetization opportunities. Streamers can engage with their audience in real-time, fostering a strong sense of community. While Twitch is widely known for gaming content, it also hosts streams on various interests, making it a versatile platform for content creators.
If you’re looking for how to start streaming on Twitch, there are multiple ways to go live. PC users can choose from:
- Twitch Studio: An official Twitch streaming tool that provides built-in templates and an easy setup for beginners.
- OBS Studio: A free, open source broadcasting software with powerful customization options for overlays, audio, and scenes.
- Restream and Streamlabs: Multi-streaming services that let you broadcast to Twitch and other platforms simultaneously.
- vMix: A professional-grade streaming software supporting multi-camera input and high-quality video production.
Meanwhile, console users can stream directly from their PS5, PS4, Xbox Series X/S, and Xbox One without needing additional software, as these consoles have built-in Twitch integration. While console streaming is more straightforward, PC software provides more flexibility and advanced customization options.
Add Live Captions to Your Streams
What do I need to start streaming on Twitch?
Before we delve into how to start streaming on Twitch with OBS, let’s take a look at the equipment you’ll need, whether you’re using OBS or another streaming software. Here is a list of essentials and optional but recommended elements for PC users:
Essentials for Twitch Streamers
- Twitch account
- Streaming software (OBS, Streamlabs, etc.)
- Stable internet connection (at least 5-10 Mbps upload speed for a smooth stream)
- Headphones (for monitoring audio)
- Microphone (a good quality USB or XLR mic for clear audio)
- A comfortable, ergonomic chair
7+ Twitch Alternatives for the Best Streaming Experience
Optional but Recommended
- Webcam (for showing your reactions)
- Lighting (a ring light of softbox for better video quality)
- Graphic design software (Canva or Adobe Photoshop for custom overlays)
- Multiple monitors (for easier stream management)
How to Start Streaming on Twitch with OBS
Now let's go through the steps on how to start streaming on Twitch with OBS. Below is a guide for beginners:
1. Download OBS Studio
Go to the OBS Studio website and download the latest release for your operating system.
2. Set Up Your Twitch Account
Log in to your Twitch account or create an account if you don’t already have one.
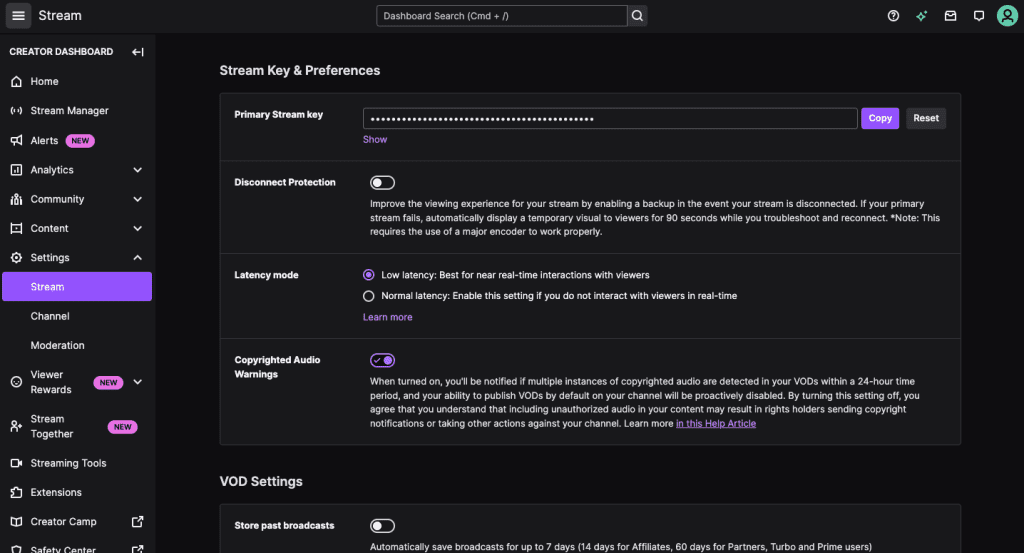
Click on your profile picture in the top right corner and select “Creator Dashboard” from the dropdown menu.
In the left sidebar, click “Settings” and then “Stream”.
Copy your Primary Stream key. (Do not share this key with anyone.)
3. Connect OBS to Twitch
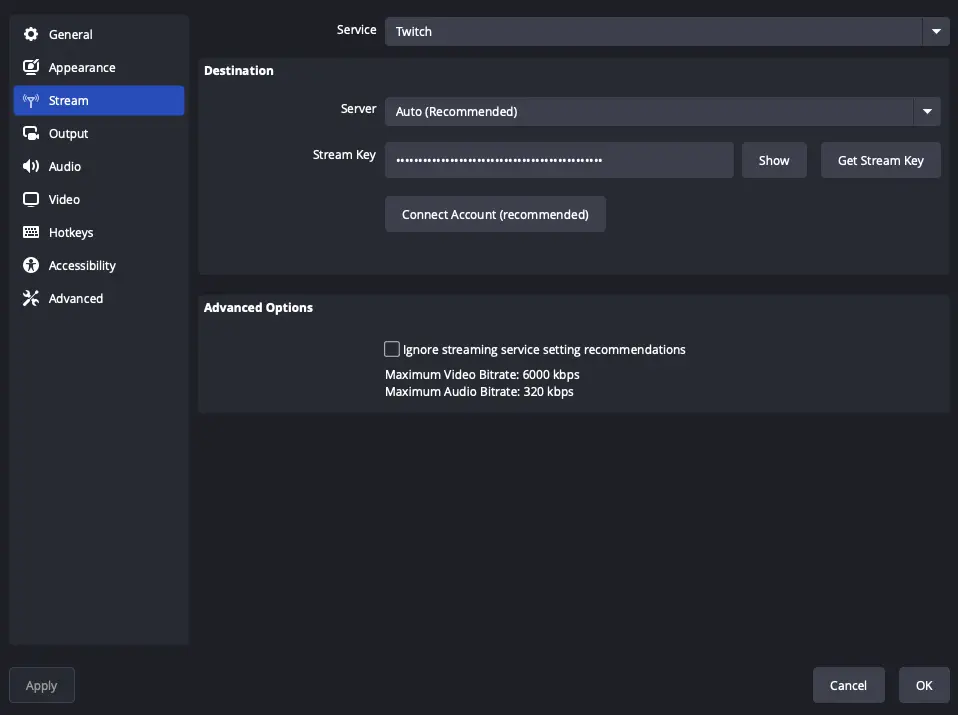
Open OBS Studio and locate the “Controls” panel on the right side. Click “Settings” to begin configuring your stream.
Go to “Stream” in the left-side menu and select “Twitch” from the dropdown “Service” menu. Then click “Use Stream Key” and paste your Twitch stream key into the designated field. Click “OK”.
4. Adjust OBS Settings
Now you can set up your audio and video. In “Settings”:
- Go to “Video” to adjust resolution and frame rate
- Go to “Output” to set your bitrate
- Go to “Audio” to choose your microphone and desktop audio source
Below is a table of the best OBS settings for Twitch streaming, depending on your internet speed and PC capabilities.
| Video Settings for OBS | Output Settings for OBS |
|---|---|
| -Base resolution: Usually, this should match your monitor's
resolution (e.g., 1920x1080 or 1280x720).
-Output resolution: This is the resolution you'll stream at. If you have a good internet connection and a decent computer, choose 1920x1080. If your internet or computer are less powerful, choose 1280x720. -FPS (Frames Per Second): 30 FPS is generally fine. If your computer is very powerful, you can try 60 FPS. |
-First, switch the "Output Mode" to "Advanced" to
see all the bitrate and encoding options. This is important because the
"Simple" output mode has limited settings.
-Bitrate: For 1080p, start with 4500 kbps. For 720p, start with 2500 kbps. You can adjust this later if needed. -Keyframe Interval: Leave this at 2. -Encoder: The encoder determines how your video is compressed. Common options are x264 (software encoding) and hardware encoders like NVENC (Nvidia) or AMF (AMD). The best choice depends on your CPU and GPU capabilities. |
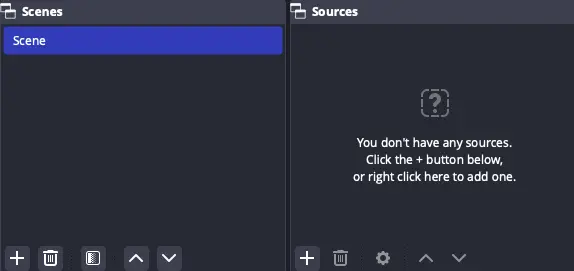
5. Add Scenes and Sources
You are ready to add scenes and sources. Find “Scenes” on the left side and click “+” to create a new scene.
Then click the “+” button under “Sources”. A menu will appear with various source options. Here are some of the most common ones and how to use them:
- Game Capture: The most efficient way to capture gameplay with minimal performance impact. Select the specific game you want to capture from the dropdown menu.
- Video Capture Device: Captures input from your webcam.
- Text (GDI+): Adds text overlays to your stream. Useful for displaying your name, game title, or other relevant information.
6. Test, Start, and Stop Your Stream
Now you can test your stream. First, click “Start Recording” to check if everything looks and sounds right. Once you’re ready click “Start Streaming”.
Finally, go to your Twitch channel to verify that the stream is working.
When you’re done click “Stop Streaming” in OBS.
How to Multistream on OBS With or Without Restream
15 Best Practices for Twitch Streaming
We’ve covered how to start streaming on Twitch with OBS; now let’s wrap up with 15 best practices you can adopt for becoming a successful Twitch streamer.
Before the Stream
- Optimize your streaming setup. Position your camera at eye level, ensure proper lighting to reduce shadows, and use a quality microphone to reduce background noise. You can use OBS noise suppression to enhance your live streams.
- Adjust OBS settings. Tweak your bitrate based on your internet speed, select the correct resolution and frame rate, and use an encoder like NVENC for better performance. Test your settings by running a private stream on Twitch to check for stability before going live.
- Create stream graphics. Design a stream layout that reflects your personal brand by using tools like Canva or Adobe Photoshop. Upload images and alerts in OBS, and use a Twitch overlay maker for a more visually appealing stream.
- Set up bots and moderation. Automate messages, moderate spam, and engage your audience with commands and mini-games. Enable Twitch’s built-in AutoMod for additional moderation and filter inappropriate content before it reaches your viewers.
- Promote your stream. Share your streaming schedule on social media platforms and create short teaser videos or posts to generate hype. Use Twitch’s "Go Live" notifications and encourage followers to turn on alerts so they don’t miss your stream.
During the Stream
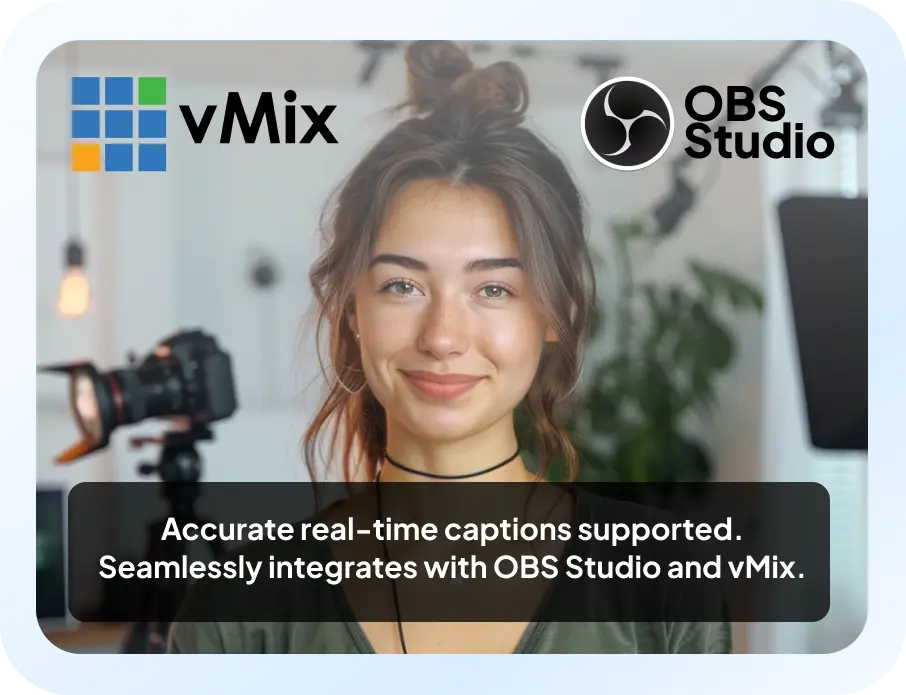
- Add live captions. Improve accessibility by integrating Maestra’s free real-time web captioner with OBS. Use the AI-powered software to make your stream more inclusive and professional.
- Foster interaction. Greet newcomers and ask questions to keep the conversation flowing. Take advantage of Twitch features like polls, channel points, and emotes to increase engagement and participation.
- Monitor chat. Enforce your chat rules and keep an eye on viewer messages. If chat moves too fast, enable slow mode or use the /clear command to reset conversations when necessary.
- Use alerts and calls-to-action. Set up overlays through OBS to display real-time notifications. Periodically remind viewers to follow, subscribe, or join your community on Discord to stay connected beyond the stream.
- Keep an eye on performance. Monitor your stream’s bitrate, dropped frames, and CPU usage in OBS to ensure a smooth broadcast. If you experience lag or quality drops, check your internet connection and adjust settings by lowering the resolution or bitrate.
- Have fun and be yourself. Authenticity keeps viewers coming back. Enjoy the experience, share your personality, and don’t stress about perfection.
After the Stream
- Thank your audience. Before ending your stream, take a moment to thank your viewers, mods, and any new followers or subscribers. You can also send a message in your Discord server to express gratitude.
- Analyze Twitch metrics. Review viewer count, chat activity, and average watch time to understand what worked well and where you can improve. Look for patterns, such as peak engagement moments and viewer retention rates, and use this data to refine future streams.
- Edit and upload highlights. Turn on Twitch’s built-in settings to directly post clips of your channel to TikTok and YouTube. Compile funniest moments, epic failures, and exciting gameplay to reach potential followers on different platforms.
- Update your streaming schedule. If your next stream is already planned, remind your audience before ending your session. If your schedule changes, update it on Twitch and notify your followers via social media or Discord so they know when to tune in.
- Network with other streamers. Raid a fellow streamer at the end of your session to introduce your audience to new content. Additionally, participate in other streams or join Twitch communities to grow your presence.
How to Be a Successful Streamer: 4 Tips for Getting Started
Frequently Asked Questions
How can you make money on Twitch?
If you’re new to Twitch, you can make money by running ads, getting subscribers, and receiving Bits (virtual currency used for tipping) from viewers. Keep in mind that you must first join the Twitch Affiliate Program, which has certain requirements. After joining, Twitch pays you a share of ad earnings and viewer contributions.
How do I start streaming easily?
You can easily start streaming by picking a platform like Twitch, installing a basic streaming software like OBS, and testing your setup. Additionally, using a live captioning tool can make your streams more accessible to a wider audience. With Maestra’s free real-time captioning tool, which integrates with OBS and vMix, you can add captions to your live stream effortlessly.
How do I start my first Twitch stream?
To set up a Twitch stream, first sign up for an account, install a broadcasting tool like OBS, and configure your stream settings. Once everything is tested, you can go live and start engaging with viewers. For a more detailed walkthrough, check out the guide above on how to start streaming on Twitch for beginners.
What is the best app to start streaming?
The best streaming app depends on your needs, but OBS Studio is a popular free option for beginners. Another powerful software is vMix, which is perfect for those who need high-quality production. Maestra offers real-time captioning integration with both tools, so you can easily add captions to your streams in 125+ languages.
What is the subtitle app for live streaming?
Maestra is the go-to subtitle app for live streaming. Its free live transcription software connects with OBS and vMix, allowing you to caption your streams in 125+ languages. Try it now and experience the power of real-time AI captions to enhance your streams.