How to Translate Videos Automatically
-
Getting Started
- Account Creation
-
Uploading Files to Cloud
- Upload to Subtitle
- Upload to Transcribe
- Upload to Voiceover
-
Advanced Editing
- Subtitle Editor
- Timeline Tool
- Transcription Editor
- Voiceover Editor
-
Translating Videos
- How to Translate Videos with Maestra
-
Maestra's Tools
- Collaborate Through Maestra Teams
- Create and Share a Session
- Custom Dictionary
- Embed Player
- Real Time Voiceover
- Real-Time Extension
- Voice Cloning
- Web Captioner
-
Integrations
- Slack Notifications
- TikTok Ads Manager
- YouTube Subtitling
- Zapier Integration
- Zoom Transcription
-
Your Data
- Privacy & Data
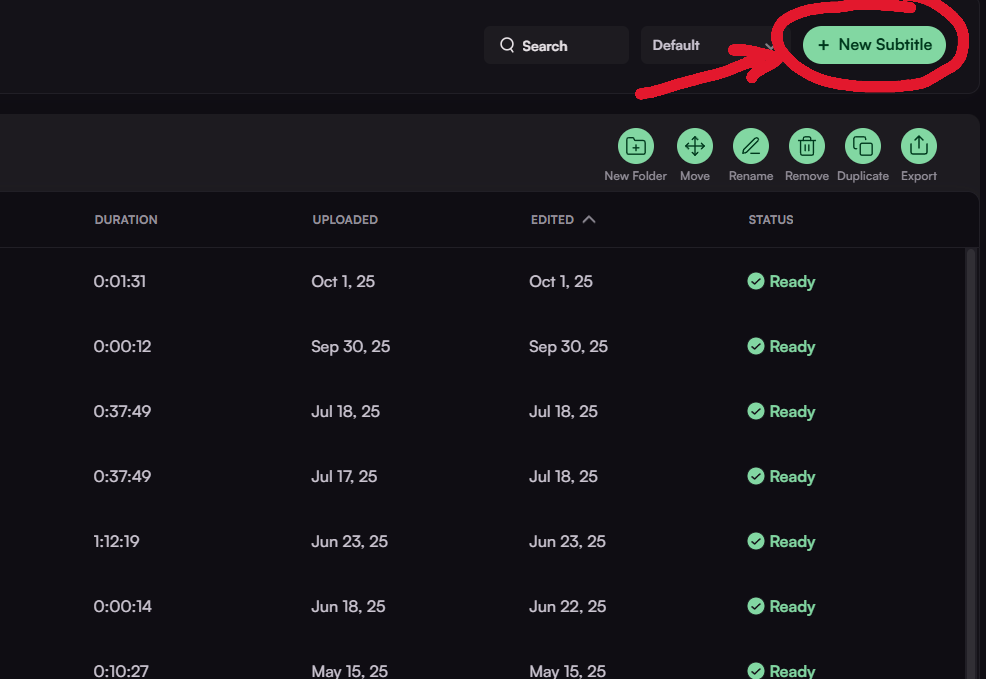
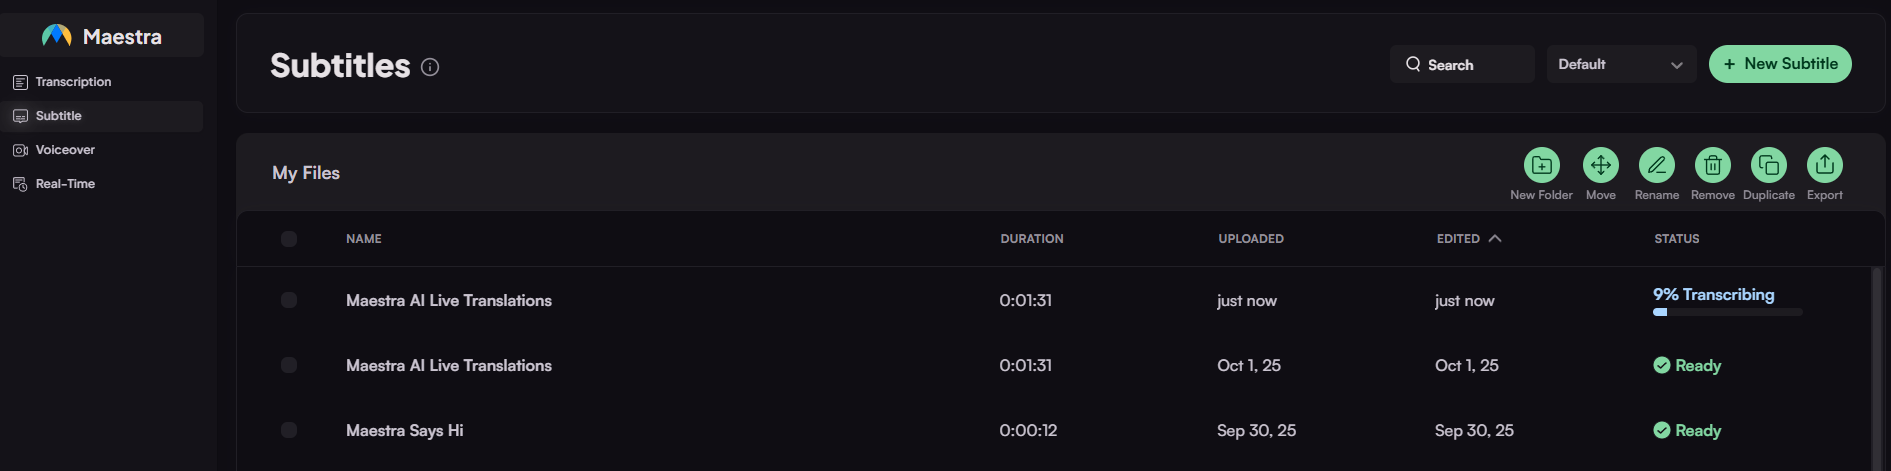
After logging in to your account, click "New Subtitle" on the top right corner of the screen.
Upload your video through various forms of uploading to Maestra's cloud.
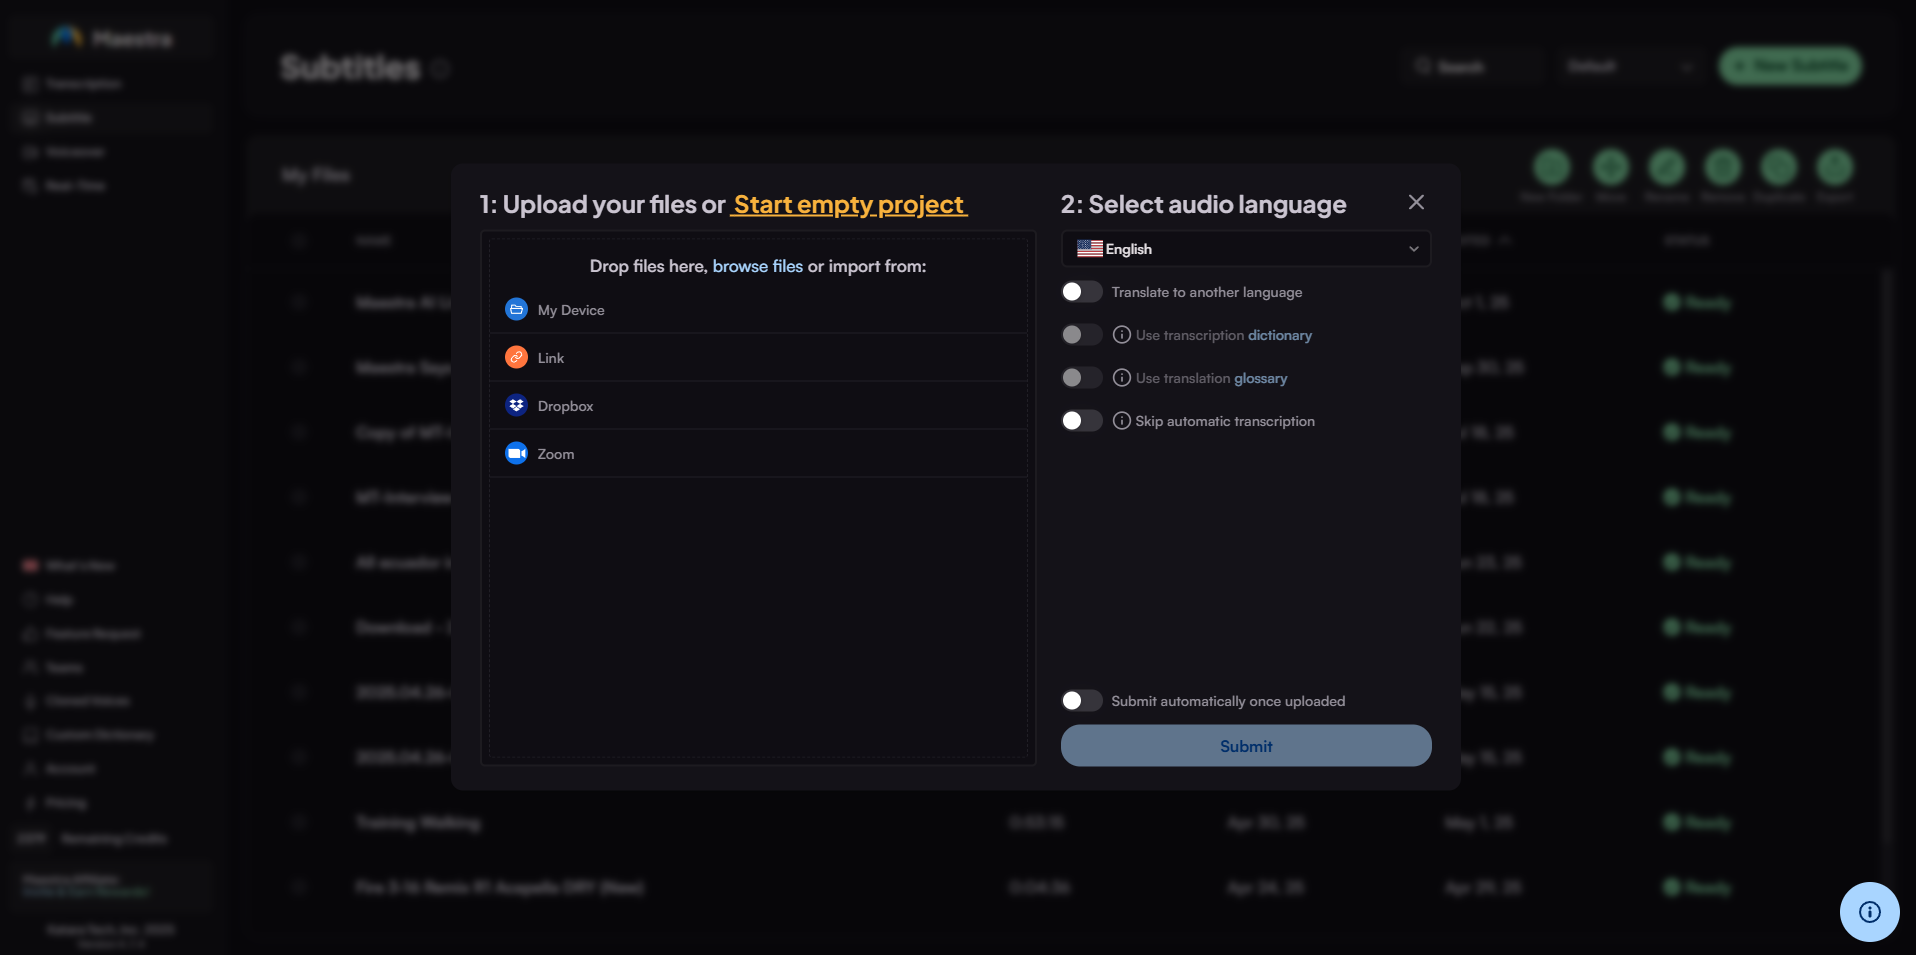
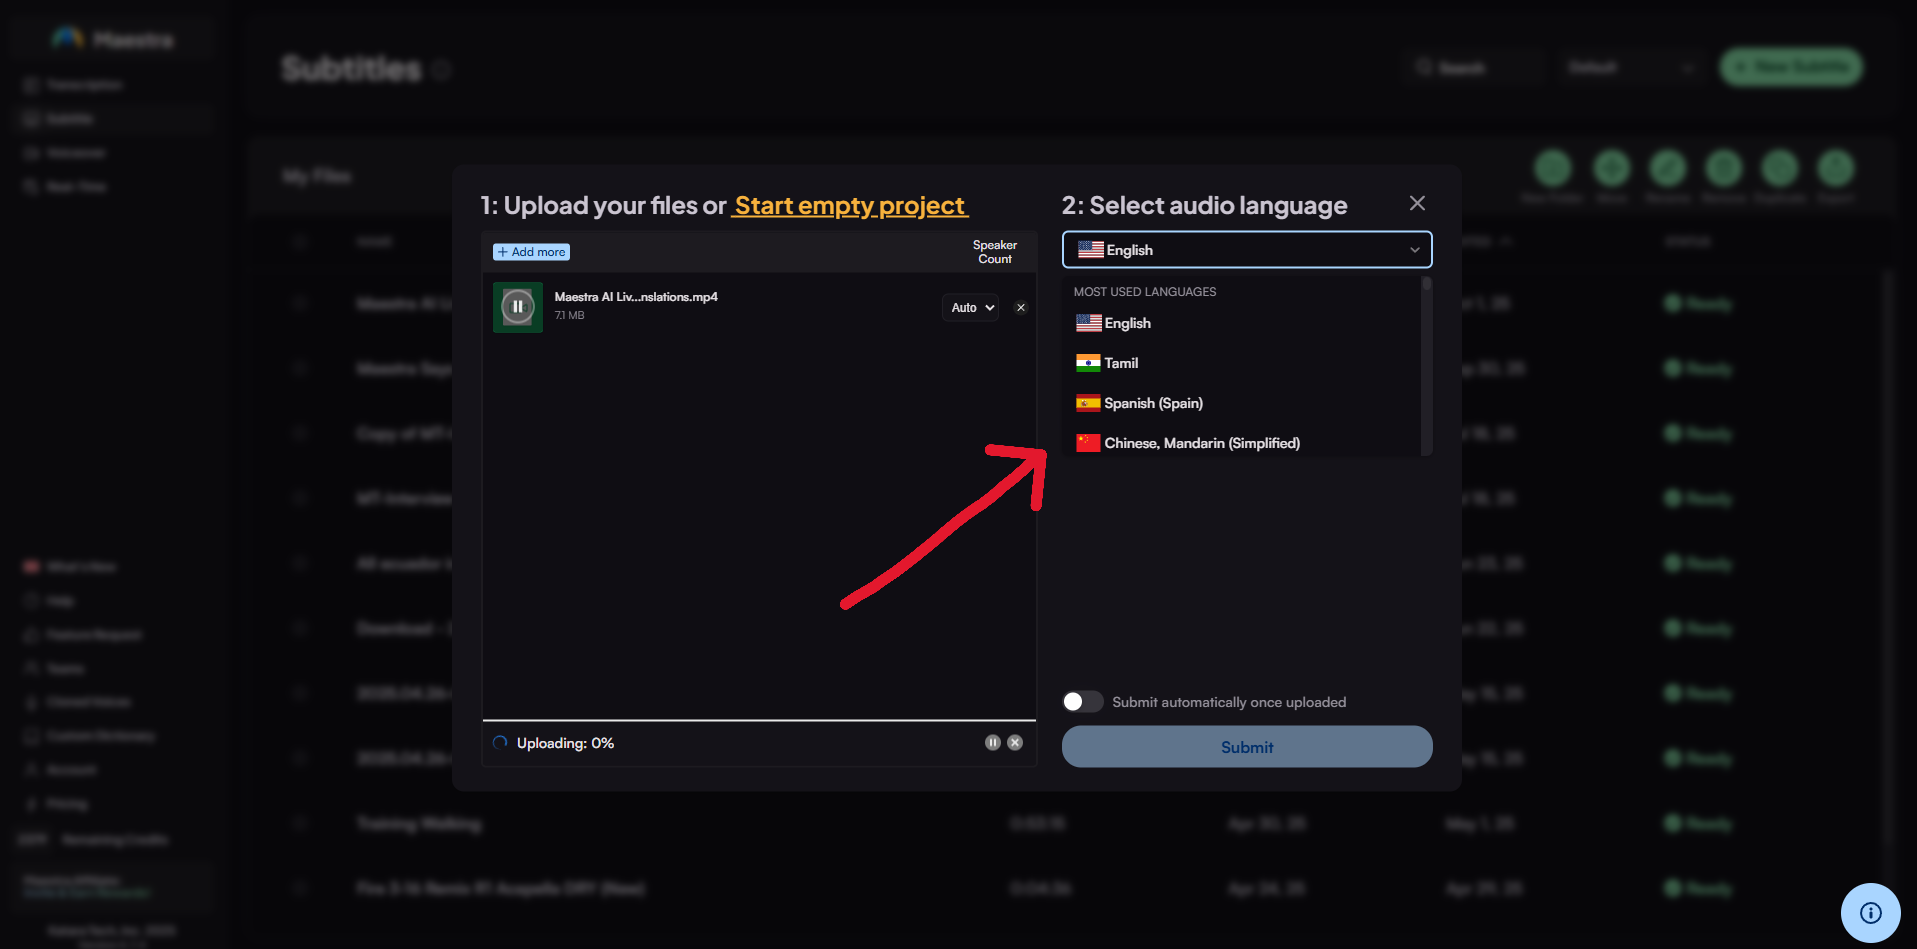
While the video is uploading, select the target language. You can also translate the video after this part.
When the uploading is done, the file begins being transcribed automatically.
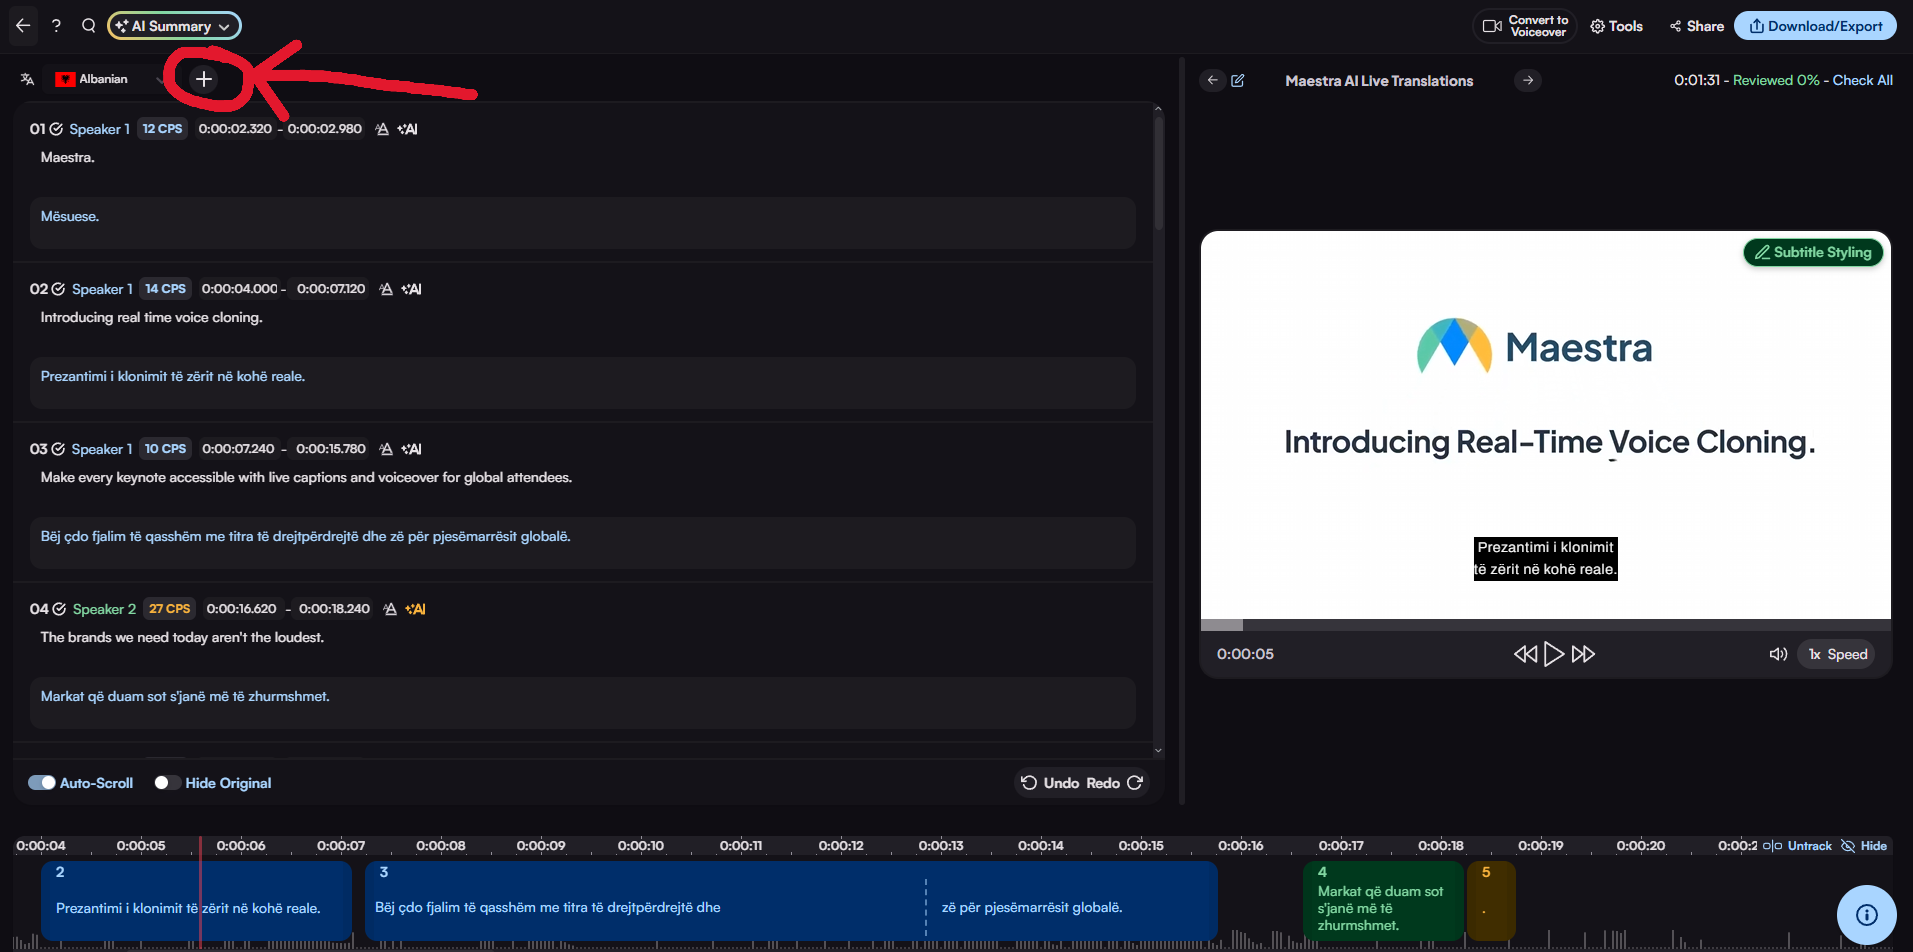
Then, click the file to see the translated text below the original version.
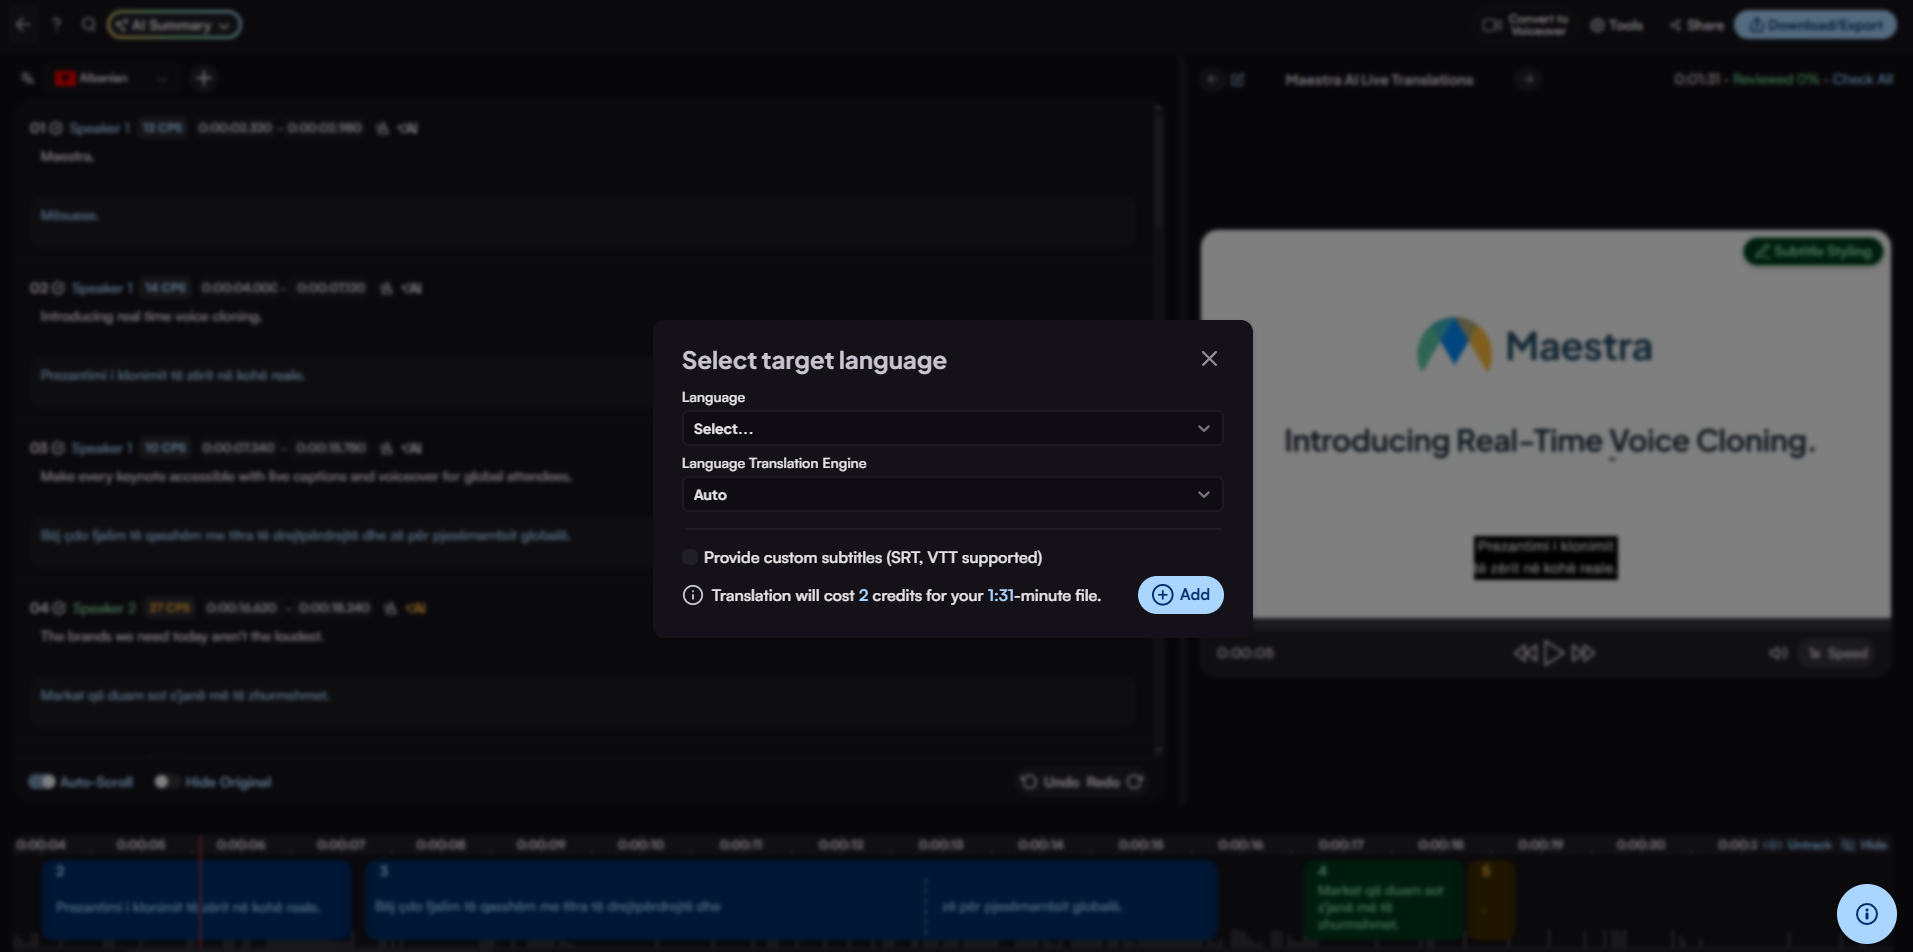
If you want to translate the file to more languages, click the "+" button in the top left corner.
Choose from more than 125 languages available in Maestra to translate the file.
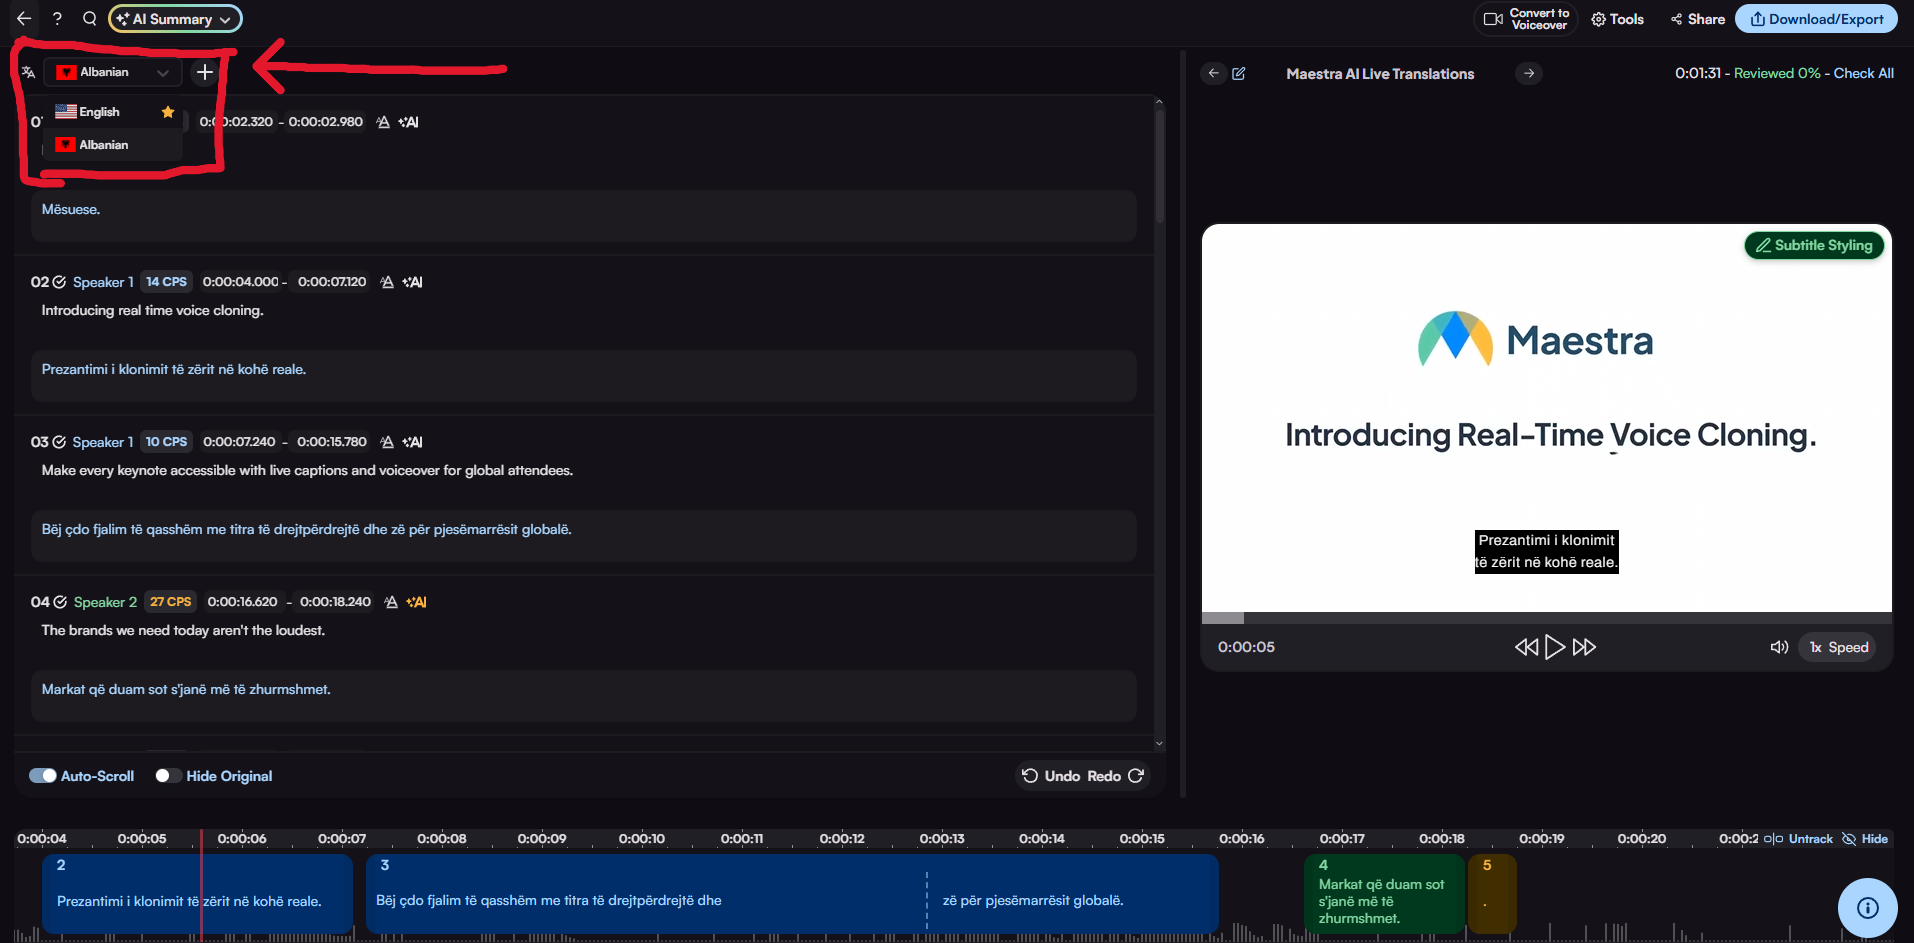
Now you can see the German translations below the original text. On the top left corner, near the "+" icon, you can switch between translations.
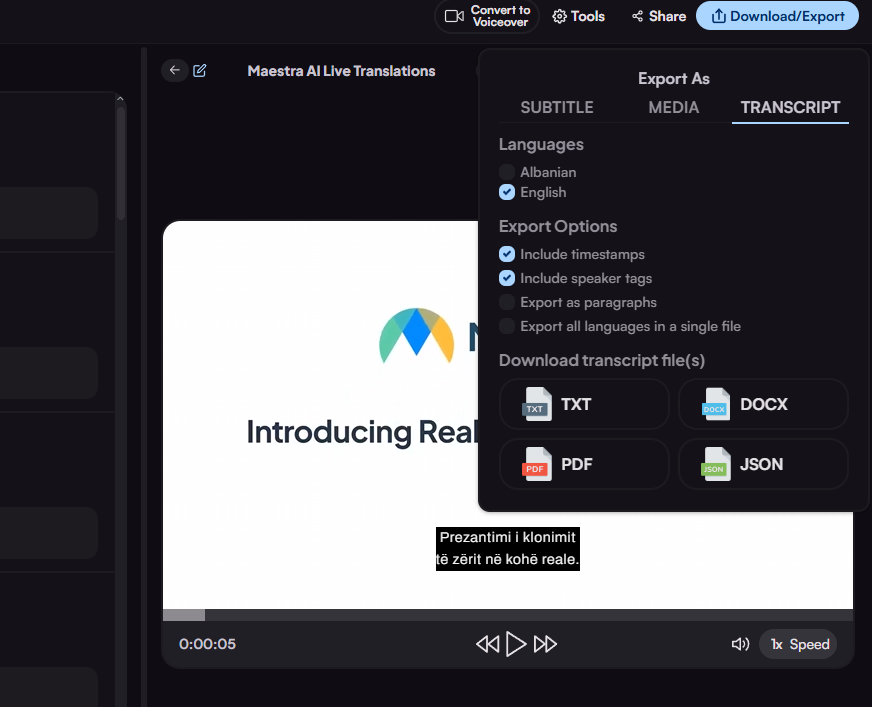
After the work is done, users can export their files by clicking the "Download/Export" button on the top right corner and export the file as a video with subtitles or a transcription.
If you have any more questions, reach us through the "i" button on the lower right side of the screen, which is the support button.