Editing Subtitles with Maestra
-
Getting Started
- Account Creation
-
Uploading Files to Cloud
- Upload to Subtitle
- Upload to Transcribe
- Upload to Voiceover
-
Advanced Editing
- Subtitle Editor
- Timeline Tool
- Transcription Editor
- Voiceover Editor
-
Translating Videos
- How to Translate Videos with Maestra
-
Maestra's Tools
- Collaborate Through Maestra Teams
- Create and Share a Session
- Custom Dictionary
- Embed Player
- Real Time Voiceover
- Real-Time Extension
- Voice Cloning
- Web Captioner
-
Integrations
- Slack Notifications
- TikTok Ads Manager
- YouTube Subtitling
- Zapier Integration
- Zoom Transcription
-
Your Data
- Privacy & Data
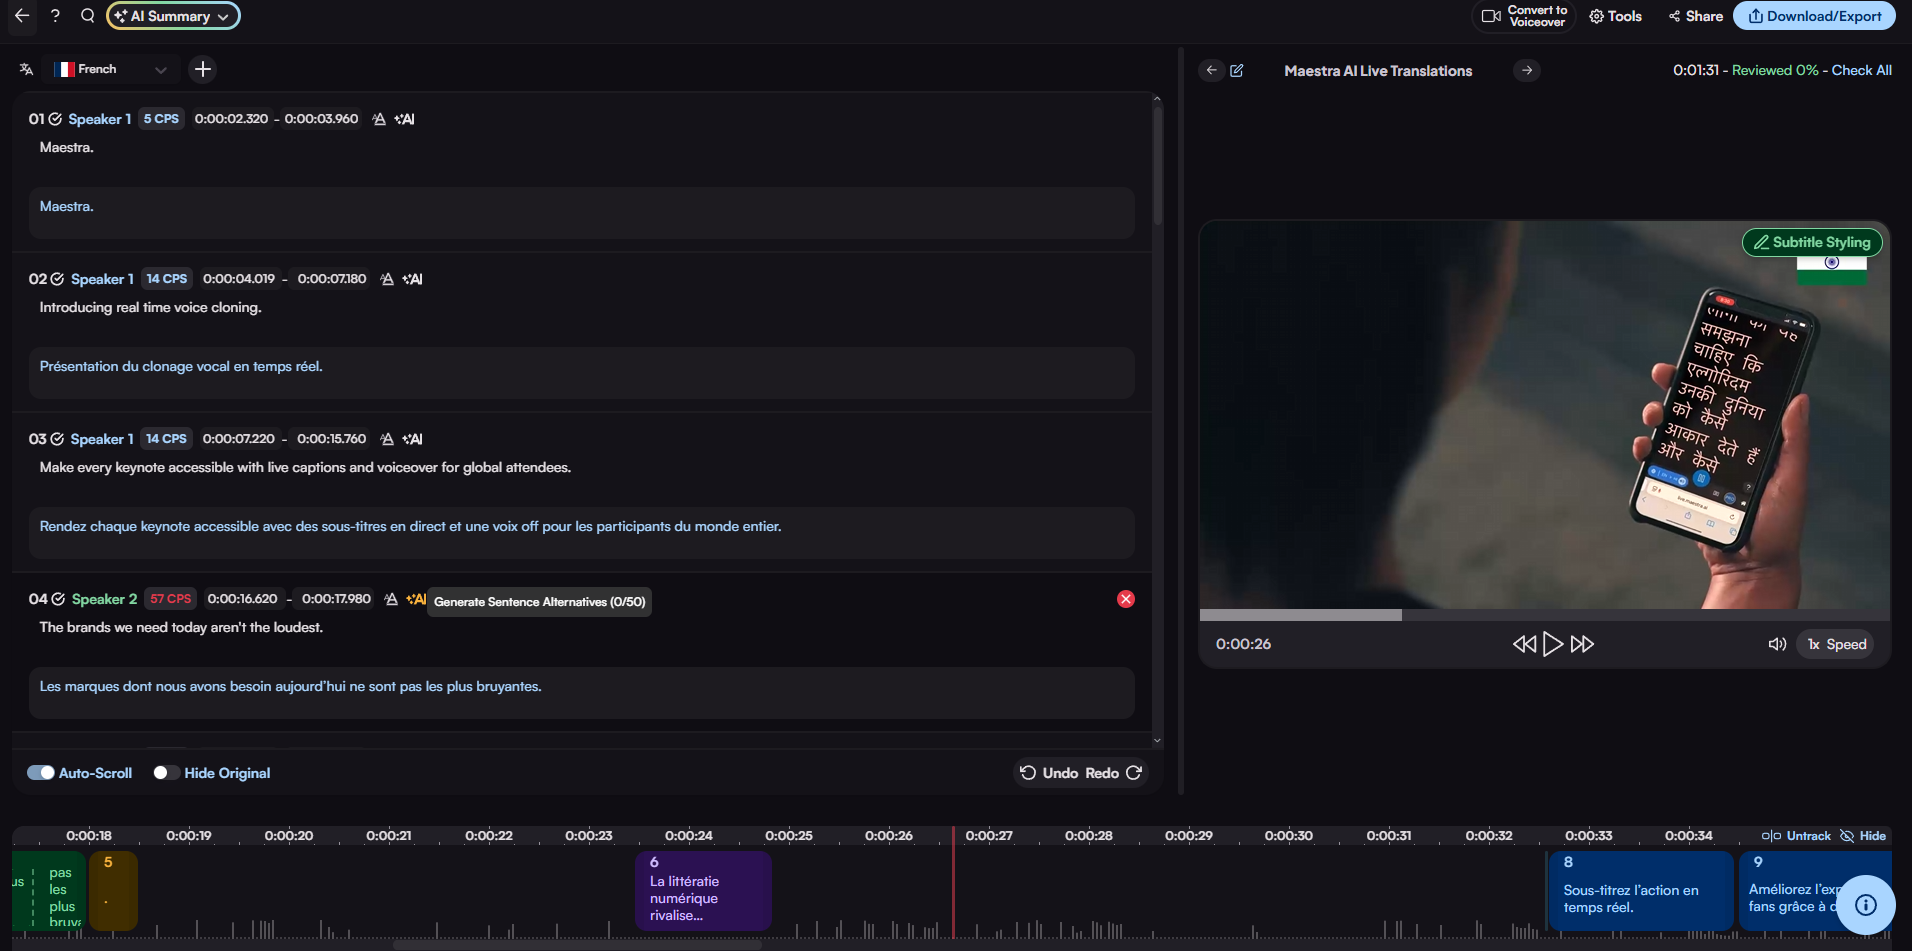
Maestra's subtitle editing page has all the tools you need in a simple interface. On the left side is where users can change timecodes, speaker names and merge or delete lines. On the right side we have the player and the formats section.
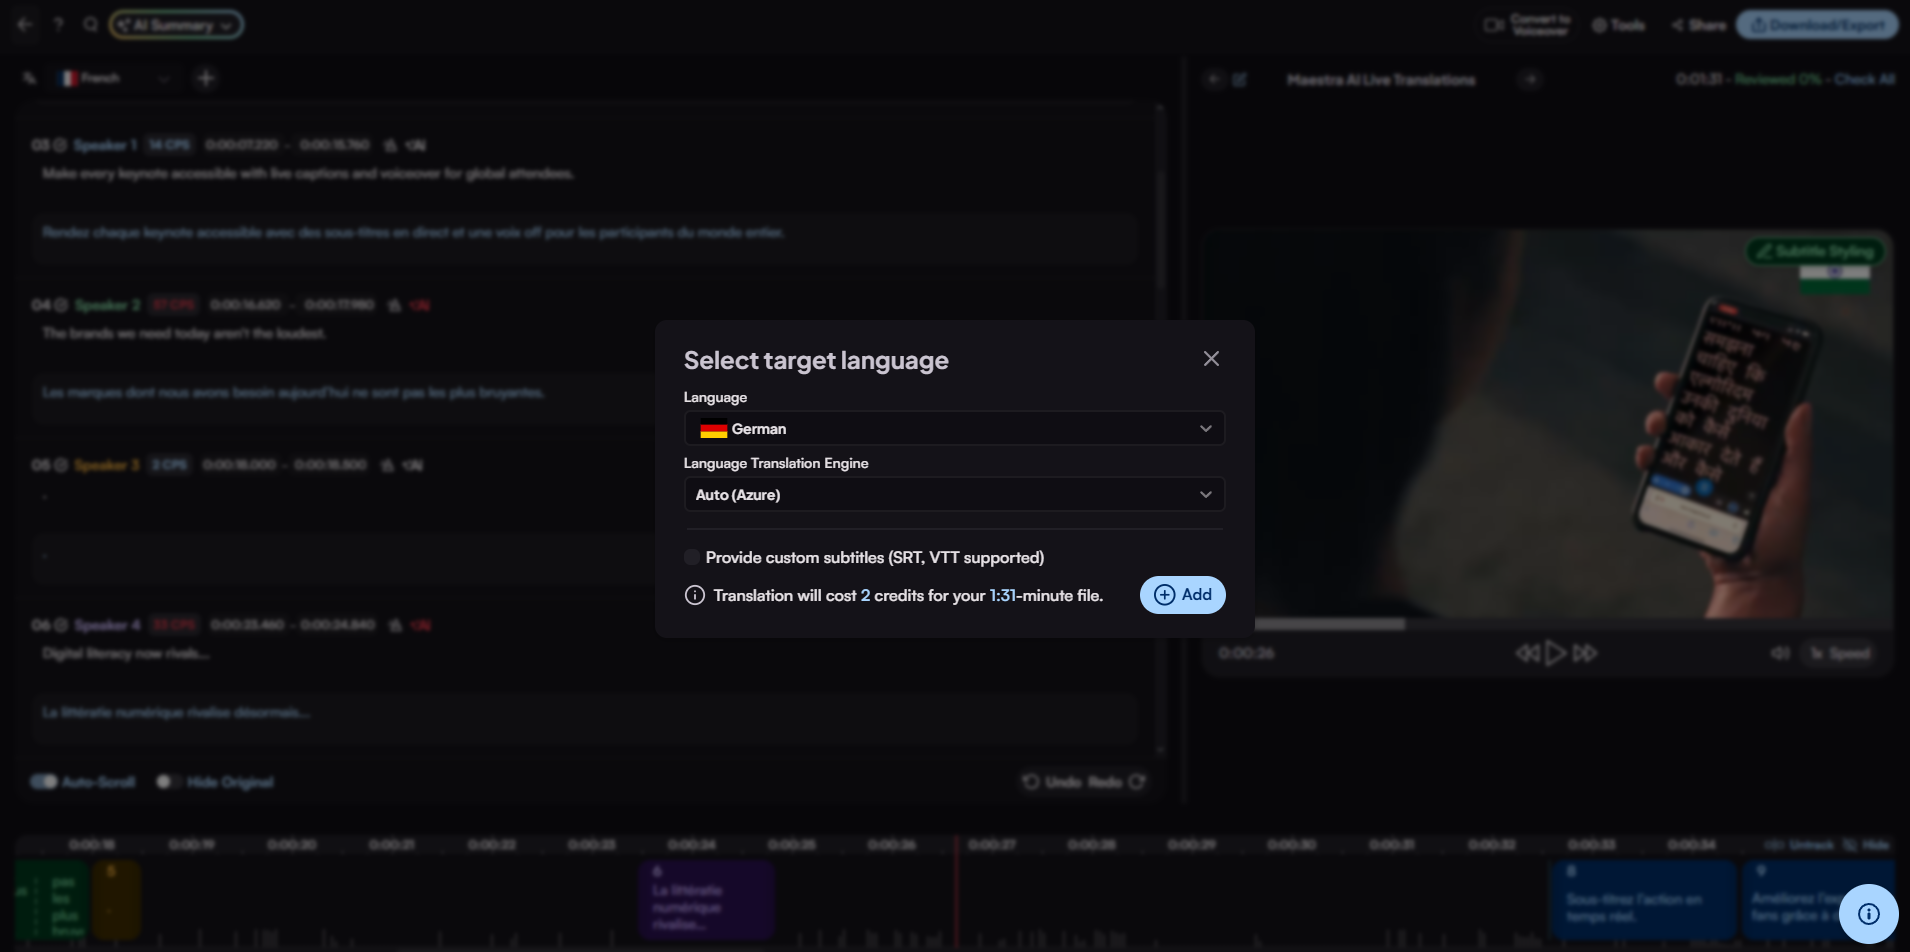
Before continuing with the editing, if you click the "+" button above the text, you can choose from more than 125+ languages and create subtitles in those languages.
Now let's have a closer look at the text section. I created French subtitles with Maestra and when you look at the 2 lines, we see the original text in English, and below that are the Spanish subtitles.
On the left side, we can change the timecodes and speaker names. Also, the CPS (Characters Per Second) tells us if we have too many characters in a line. If we have more than acceptable, it will change its color to yellow, then red.
On the right side, the "X" button is for removing the subtitle. The "+" symbol adds a subtitle and the symbol next to it merges the subtitles.
Above the text, if you click the "Hide Translations" button, only the original text will be seen. Also, users can copy their work to a new file or import other subtitles.
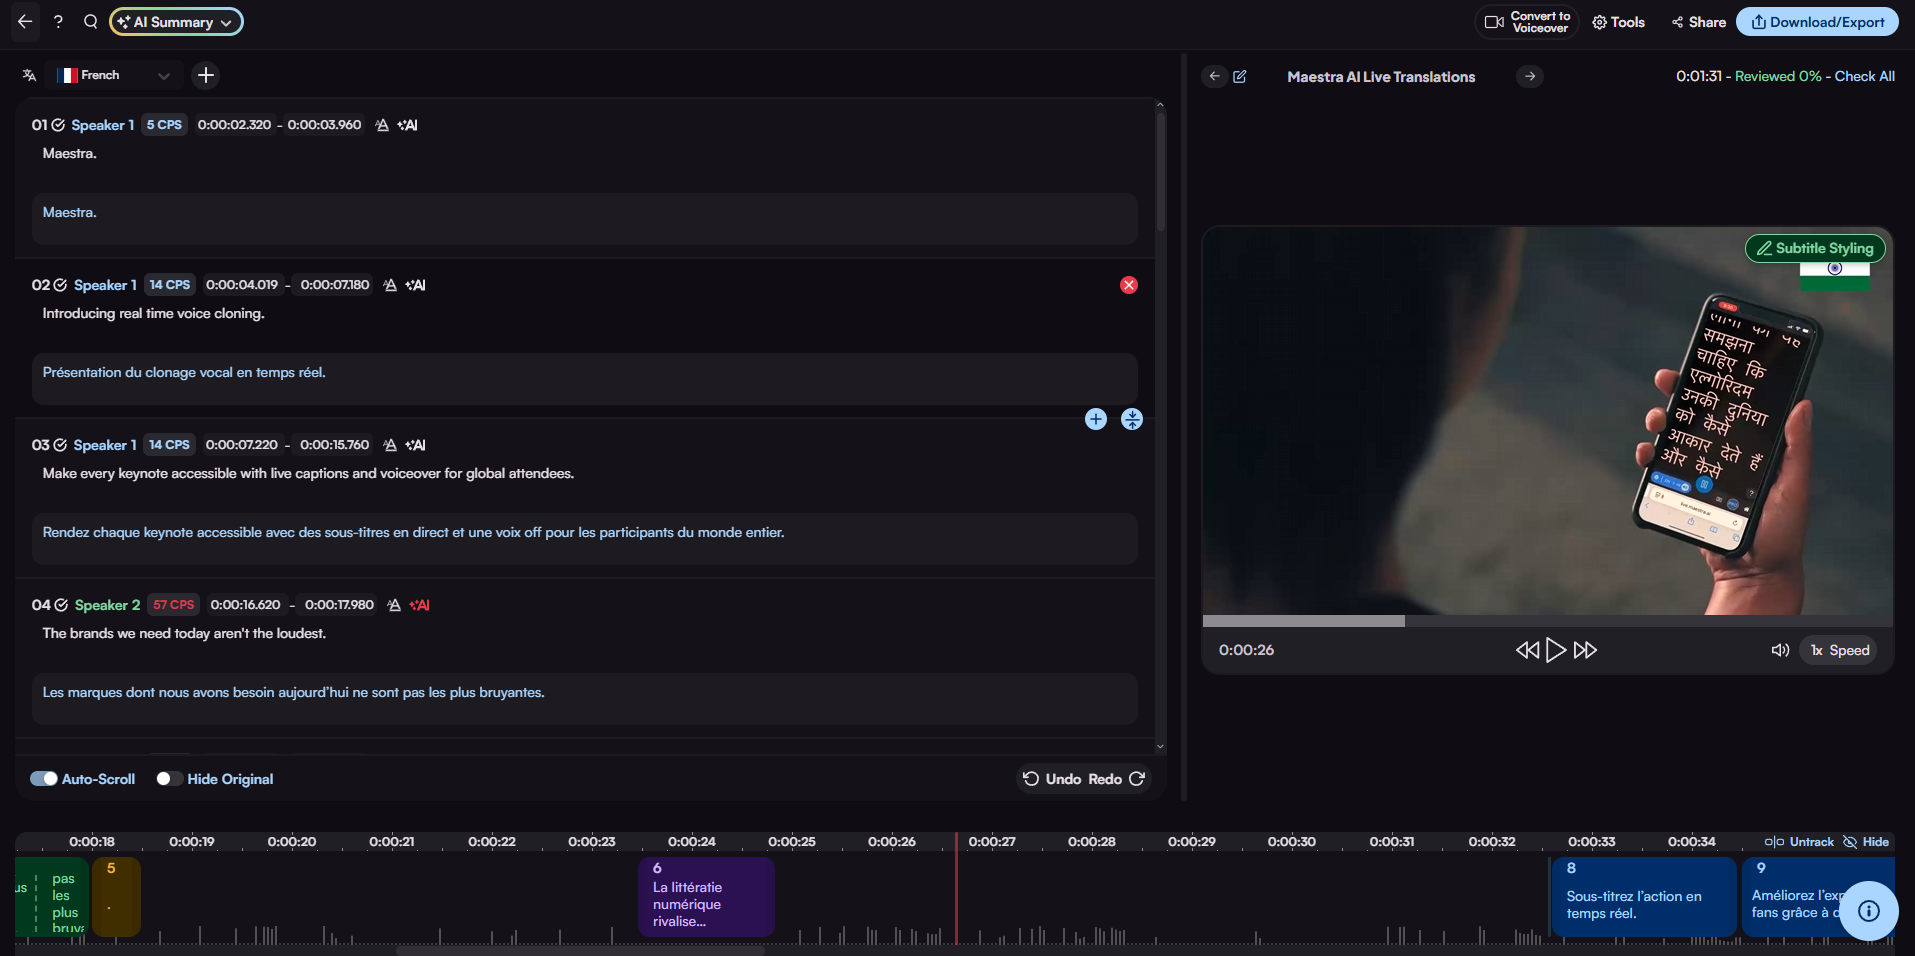
Users can edit both the original text and the translation. If we change the original text, the translation will automatically correct itself. But if we change the translation, Auto-translate will disable itself.
If you reach the character limit and the CPS shows as red, you may also press the "Generate Sentence Alternatives" button to fidn alternative texts in order to meet the CPS limits.
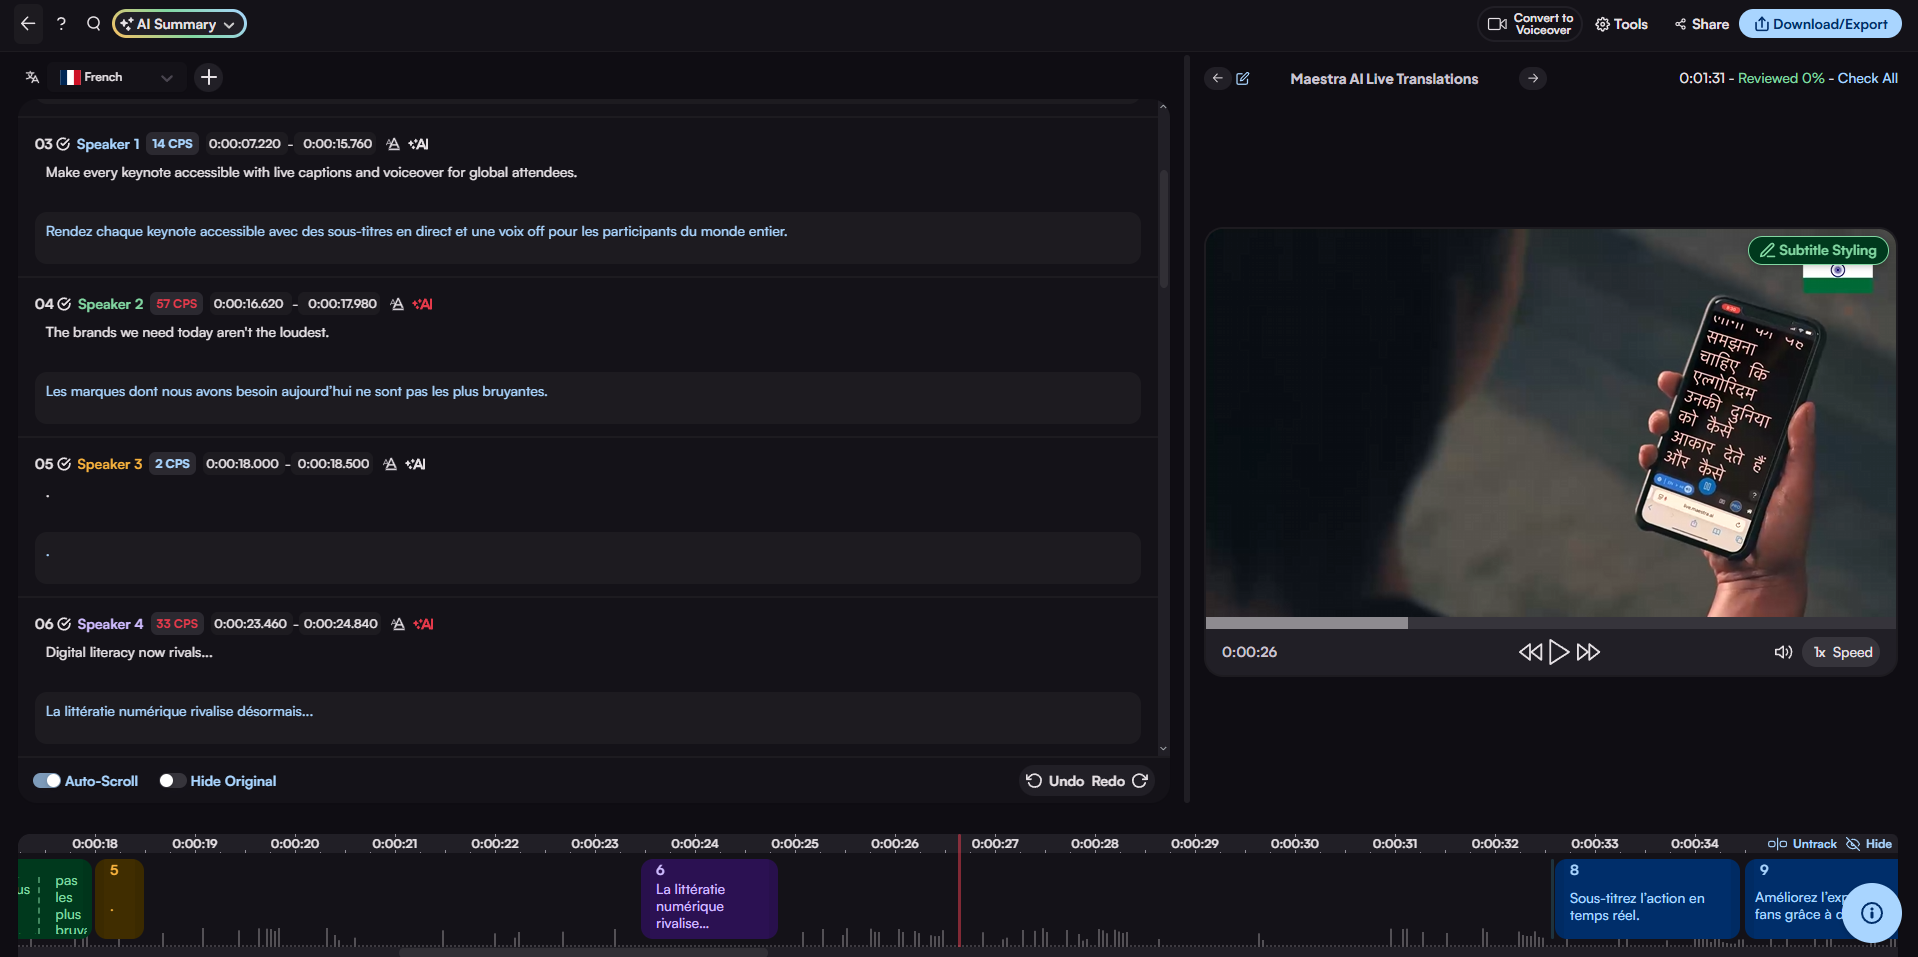
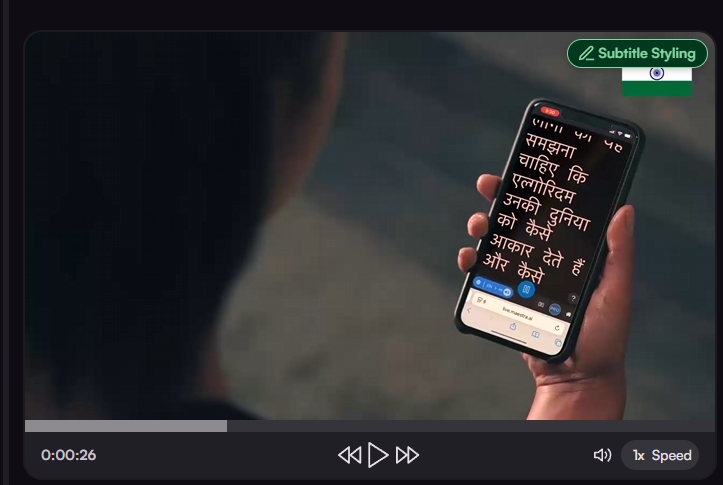
Now let's look at our player. Here, you can choose the speed of the video, mute the video, fast forward or rewind.
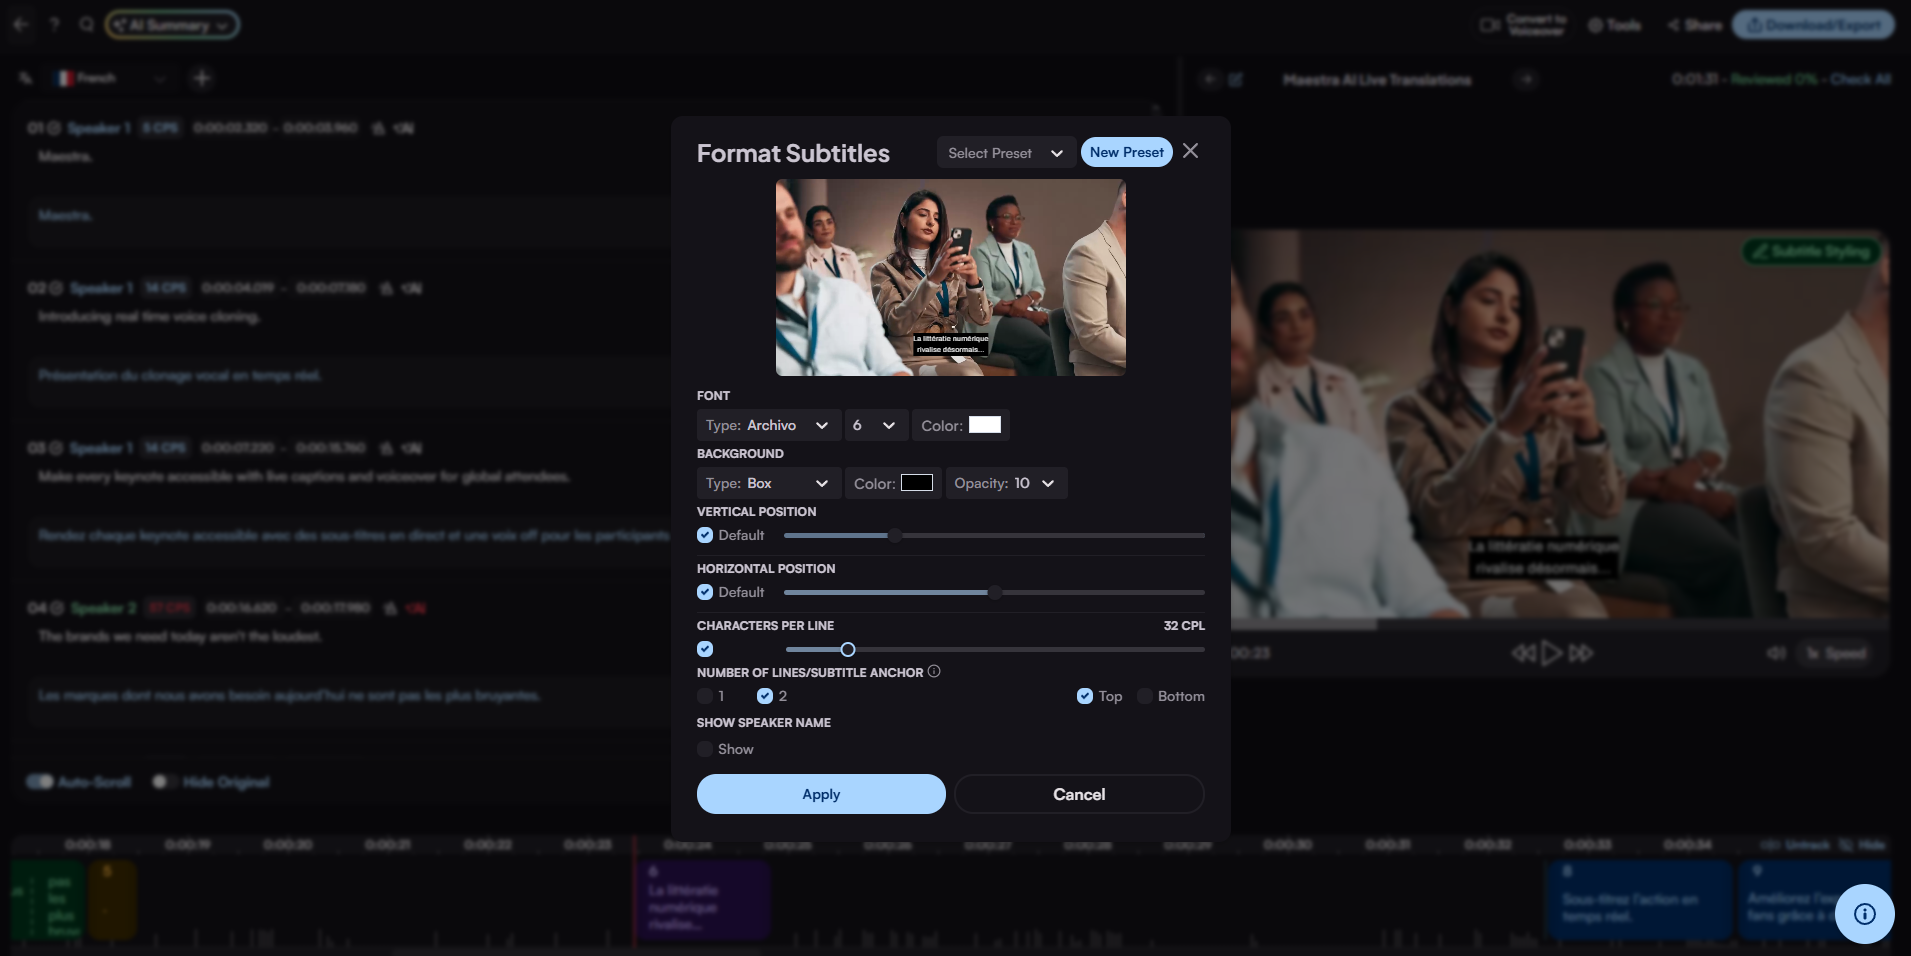
And if you click "Subtitle Styling", this window will pop up showing you different options for changing the format of the subtitles.
First, you can change the font, the size of the font and its color. You can also change the background of the subtitles and their vertical position.
Users can limit the character count in a single line of subtitle by sliding the "Characters Per Line" bar. This can make your job easier if a business limits the characters they want in a single line. Below that you can choose if you want a single line or 2 lines of subtitles and if you want the anchor at the bottom or the top.
If you click the last option, speaker names will show up in subtitles.
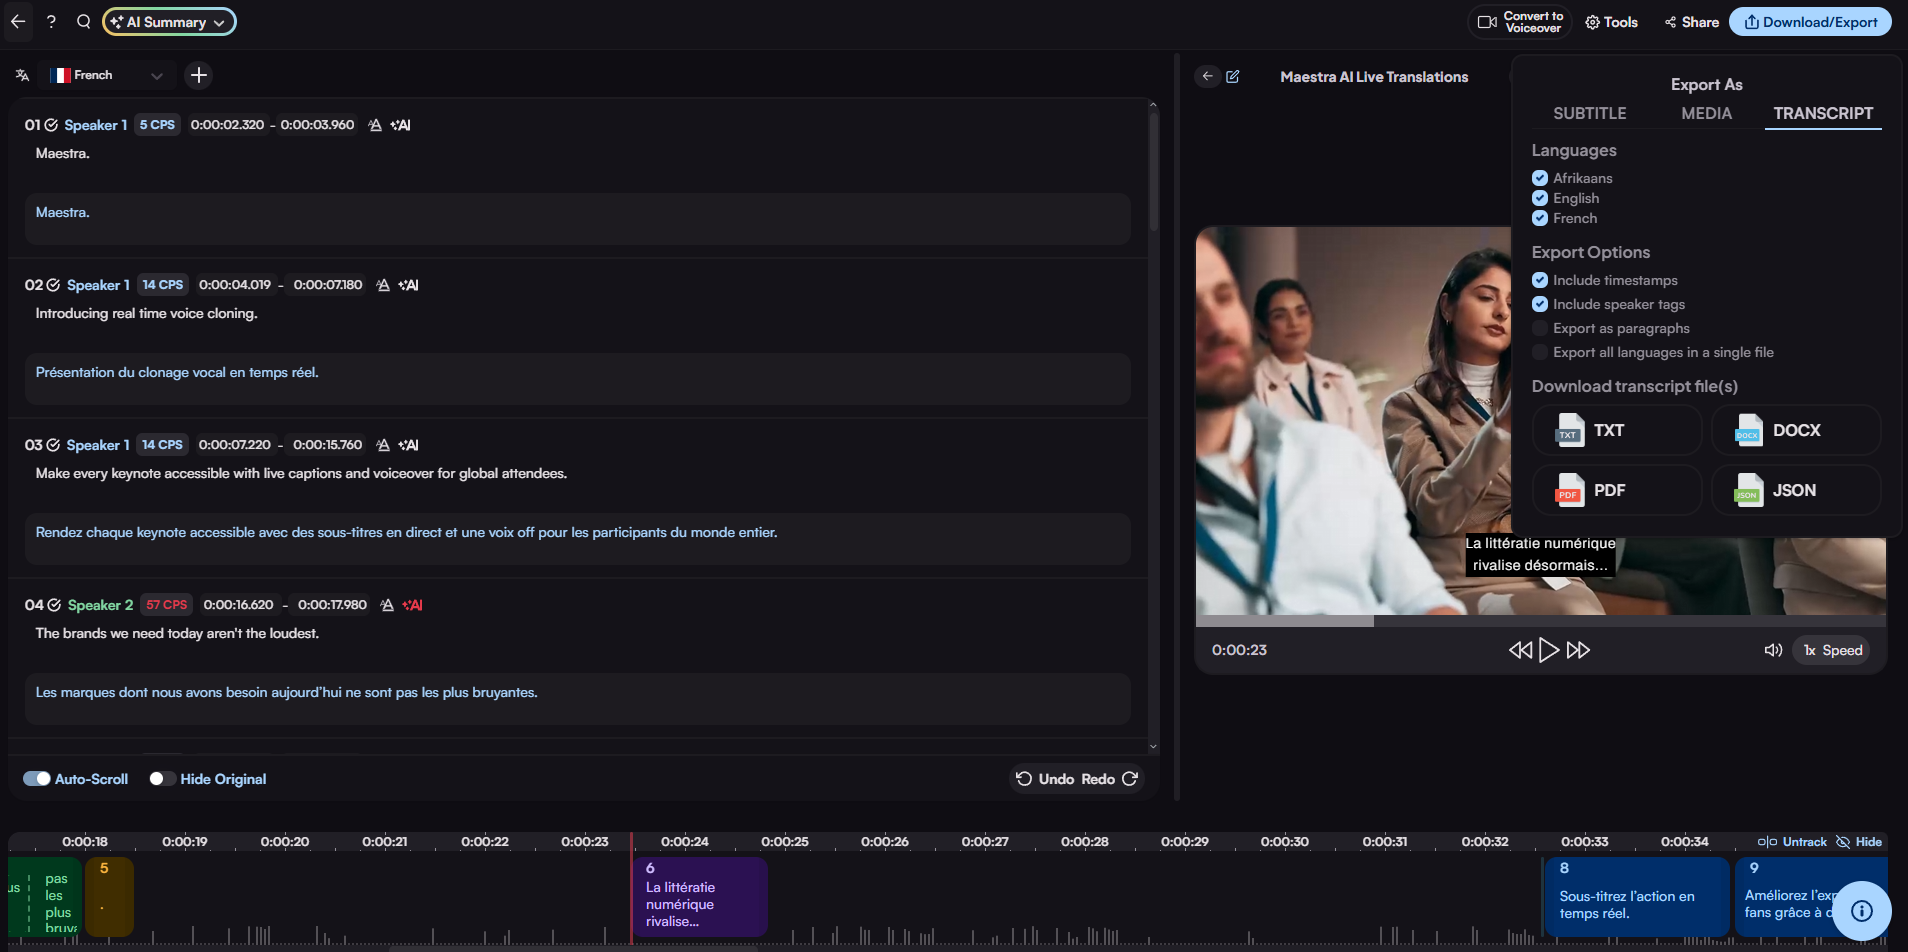
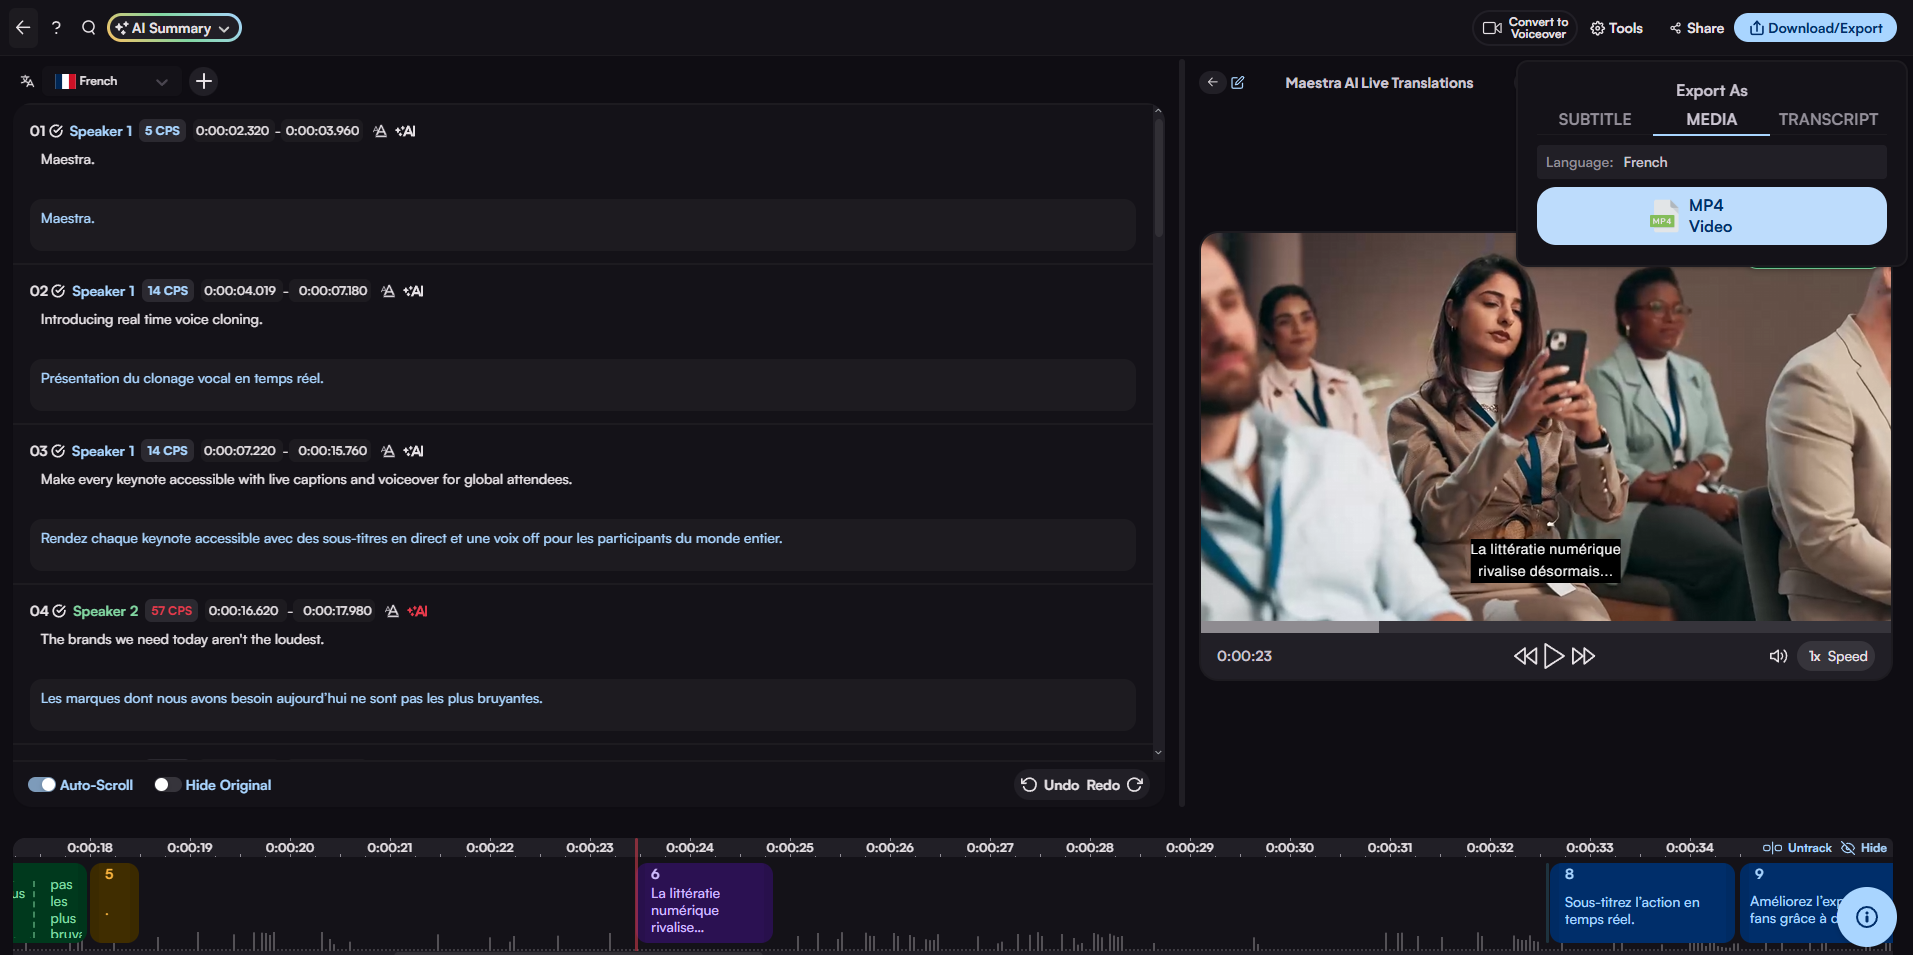
After the editing is finished, click "Download/Export" which is located in the upper right corner. There are 3 main options for exporting which are "Subtitle", "Media" and "Transcript". Maestra supports popular subtitle formats like SRT, VTT, SCC, STL and more. You can also export more than one translation at a time, which will download the subtitles as a zip file.

By clicking "Export" and choosing "Media", users can export their file as an MP4 file, which is a video format.
The third option which is "Transcript", allows users to include timestamps, speaker tags when they export their file as a TXT file, Word Document or PDF. You can choose multiple translations you have made while exporting and can export as paragraphs as well as export all translations in a single file.