Editing Voiceovers with Maestra
-
Getting Started
- Account Creation
-
Uploading Files to Cloud
- Upload to Subtitle
- Upload to Transcribe
- Upload to Voiceover
-
Advanced Editing
- Subtitle Editor
- Timeline Tool
- Transcription Editor
- Voiceover Editor
-
Translating Videos
- How to Translate Videos with Maestra
-
Maestra's Tools
- Collaborate Through Maestra Teams
- Create and Share a Session
- Custom Dictionary
- Embed Player
- Real Time Voiceover
- Real-Time Extension
- Voice Cloning
- Web Captioner
-
Integrations
- Slack Notifications
- TikTok Ads Manager
- YouTube Subtitling
- Zapier Integration
- Zoom Transcription
-
Your Data
- Privacy & Data
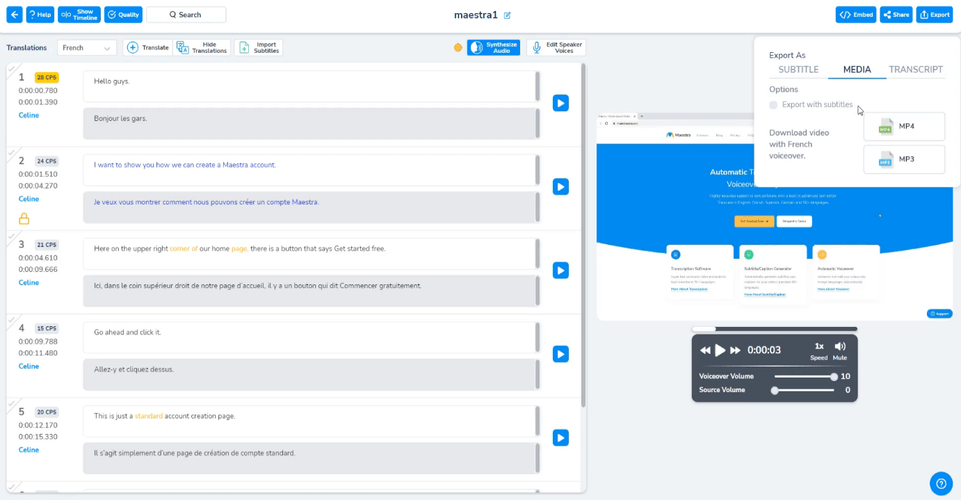
Here is Maestra's voice editing page. On the right is the player where users can preview their edits as the video plays. On the left is where we can edit the text, timecodes, speaker names and more.

On the left side of the text editor, you can adjust timecodes and speaker names. The CPS (Characters Per Second) indicator shows whether a line has an appropriate number of characters. If the value is too high, the CPS icon will turn yellow and then red. When this happens, the voiceover will need to read the text unnaturally fast to keep up. To fix this, simply edit or split the lines to create a smoother, more natural voiceover.
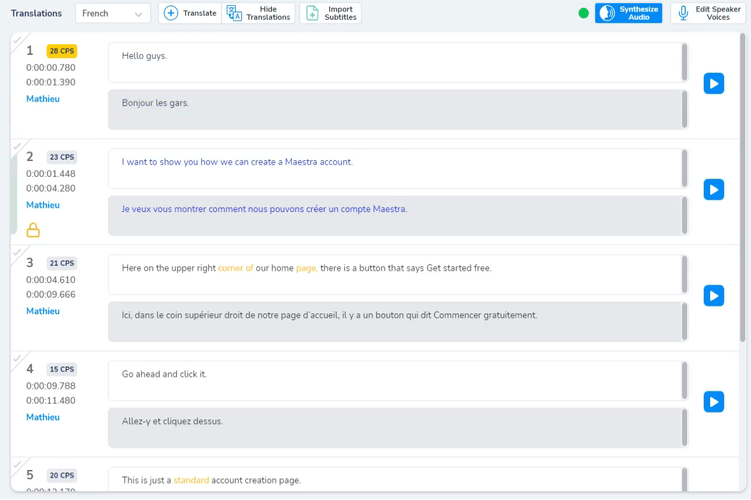
On the right side of the text, the "+" button adds a line and the button next to it merges lines. If you look at the image above, if we were to merge lines, lines 2 and 3 would merge. Or if we were to add, a line would be added between lines 2 and 3.
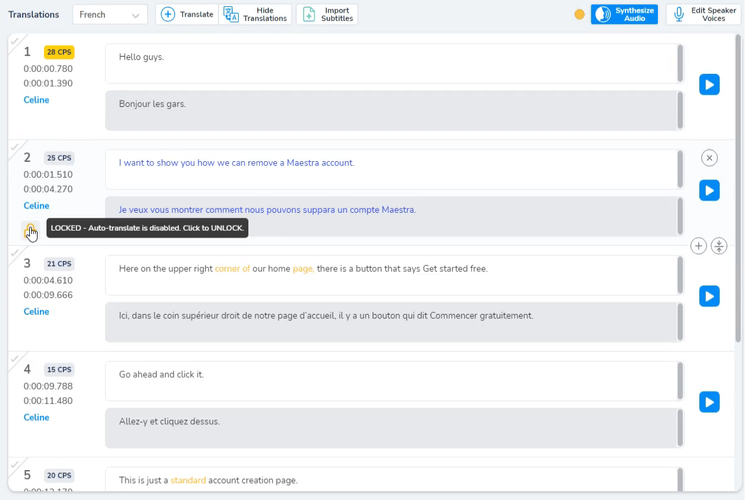
When editing the text, we have 2 versions. The original version is above, and below is the translation. Any changes we make to the original version will be automatically translated to the version below. But if you make changes to the translation, Auto-translate will be disabled. You can turn on the Auto-translate by clicking the "Locked" symbol as you can see on the image
Also, Maestra tells users if the translations might be inaccurate. The color yellow shows that the translation has a medium level of inaccuracy, and the color red shows that the translation is likely inaccurate.
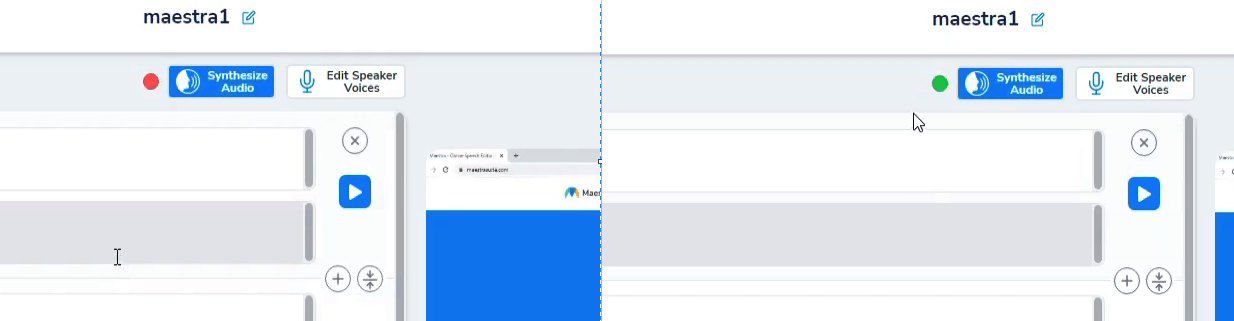
The "Synthesize audio" button which is located on the upper-middle part of the screen is the button that generates the voiceover. After every edit you make, you need to click this button in order to change the voiceover.
The first time you click this button, you can choose from a diverse selection of voices and assign different voices to different speakers through this window.
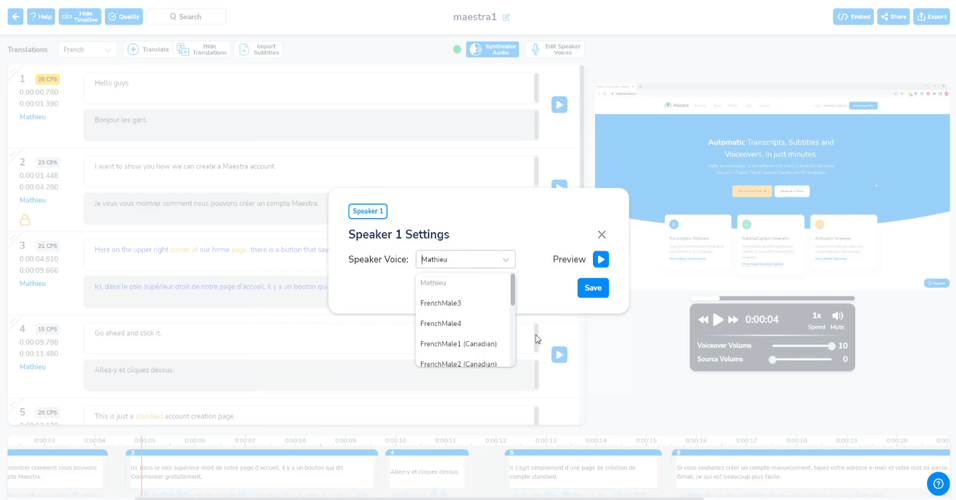
After you select the voices, click "Save" and "Synthesize audio" to generate the voiceover. Once the voiceover is generated, the circle near the button will turn green.
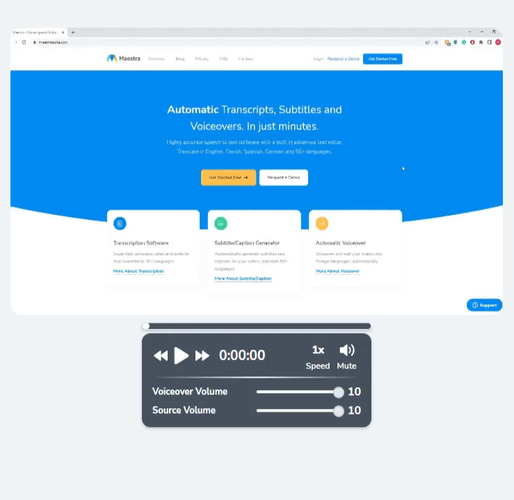
On the right side of the screen is where users can preview their edits and edit the volumes. The source volume is the volume of the original sound of the file and the voiceover volume is the volume of the voiceover you generated. You can change their volumes and find the perfect spot that fits your needs.
Also, users can fast forward or rewind the video, change the speed at which the video plays or mute the video.
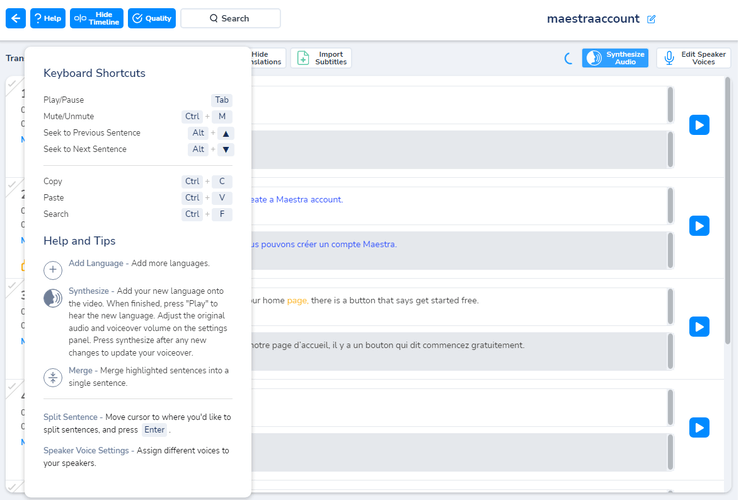
On the upper left corner of the screen, the "Help" button shows users the shortcuts to many actions they can take in Maestra's voiceover editor as well as some tips.
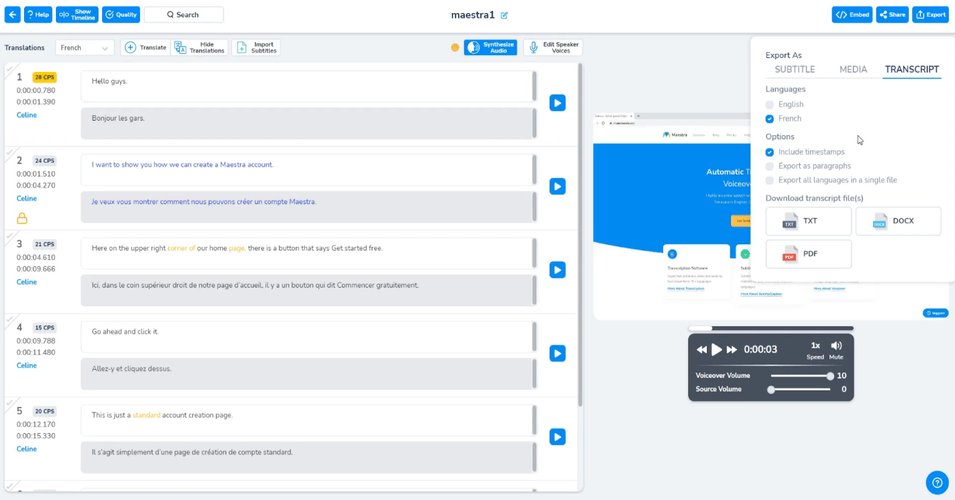
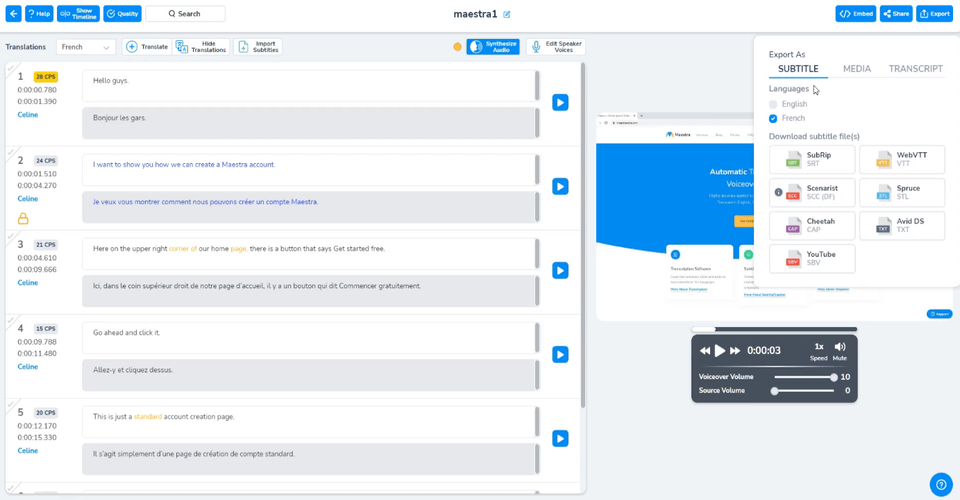
When the editing part is done and you are satisfied with the outcome, you can click "Export" which is located in the upper right corner of the screen and begin exporting. You can export in 3 main types of files, which are subtitle, media and transcript.
The subtitle option allows users to export their files in popular subtitle formats such as SRT, VTT, SCC and more. You can also export the file with all the translations you have made which will be in a single zip file.
The second export option is media. This is where users can export the file as an MP4 file which is a video format, or an MP3 file which is a popular audio format. Alternatively, exporting with subtitles is available in this option.
The last option of exporting is "Transcript" which allows users to export their files as a transcript. You can choose to include timestamps in the file, as well as exporting as paragraphs and exporting all translations in a single file. Ultimately this option lets you export the file as a text file, as a Word Document or as a PDF. If you have any more questions you can always reach us through the "?" on the lower right corner of the screen, which is our help button.