Adding Subtitles or Captions to YouTube Videos
-
Getting Started
- Account Creation
-
Uploading Files to Cloud
- Upload to Subtitle
- Upload to Transcribe
- Upload to Voiceover
-
Advanced Editing
- Subtitle Editor
- Timeline Tool
- Transcription Editor
- Voiceover Editor
-
Translating Videos
- How to Translate Videos with Maestra
-
Maestra's Tools
- Collaborate Through Maestra Teams
- Create and Share a Session
- Custom Dictionary
- Embed Player
- Real Time Voiceover
- Real-Time Extension
- Voice Cloning
- Web Captioner
-
Integrations
- Slack Notifications
- TikTok Ads Manager
- YouTube Subtitling
- Zapier Integration
- Zoom Transcription
-
Your Data
- Privacy & Data
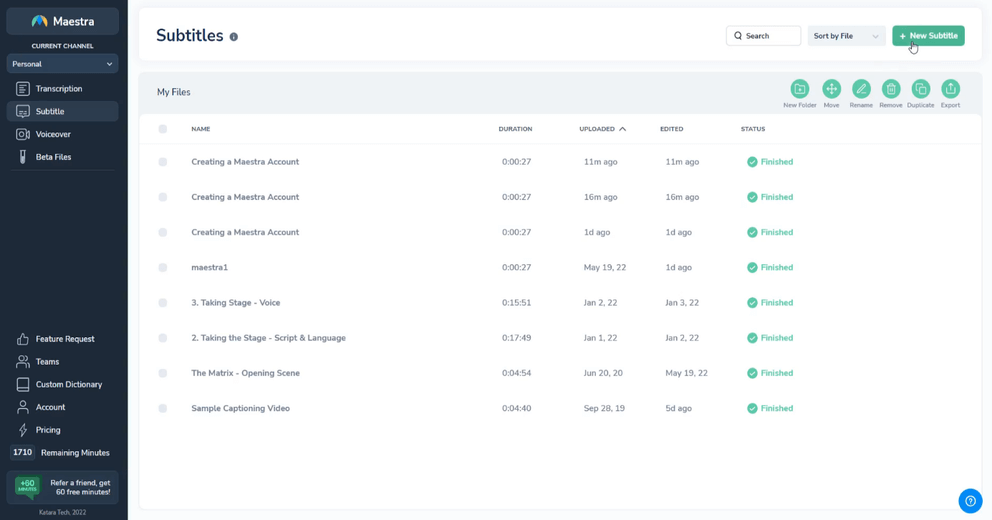
Maestra's uploading tool allows users to add subtitles or captions directly to their YouTube videos. Once you are on the main page, click "New Subtitle" in the top right corner.
Then, choose the Youtube option on the window that pops up.
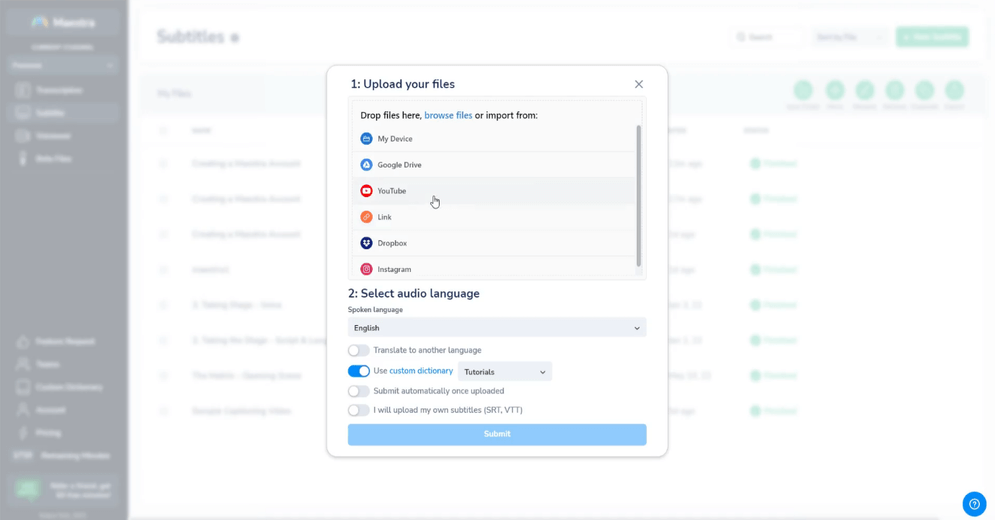
Choose your YouTube channel and allow permissions on the window that pops up.
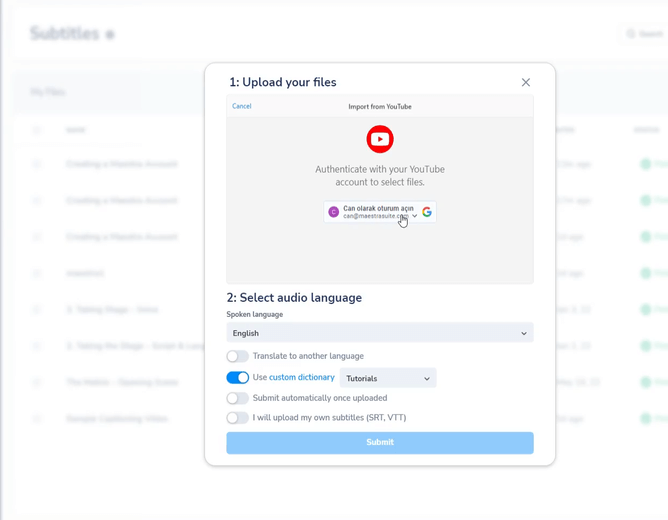
The videos you have on the channel will show up. Here, you can generate subtitles for that video. You can also generate subtitles after this part. Click "Next" to start uploading.
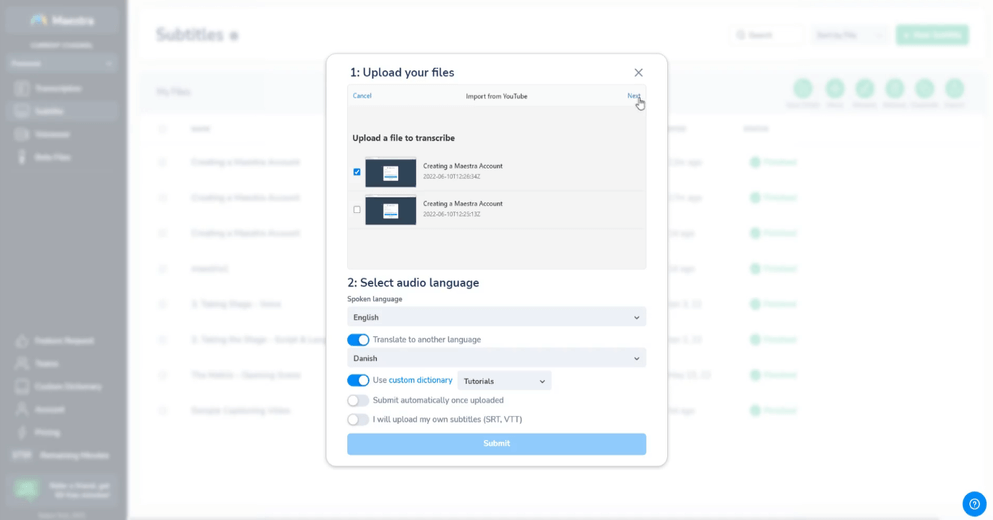
Once the uploading is done, click "Submit" to start the transcription process.
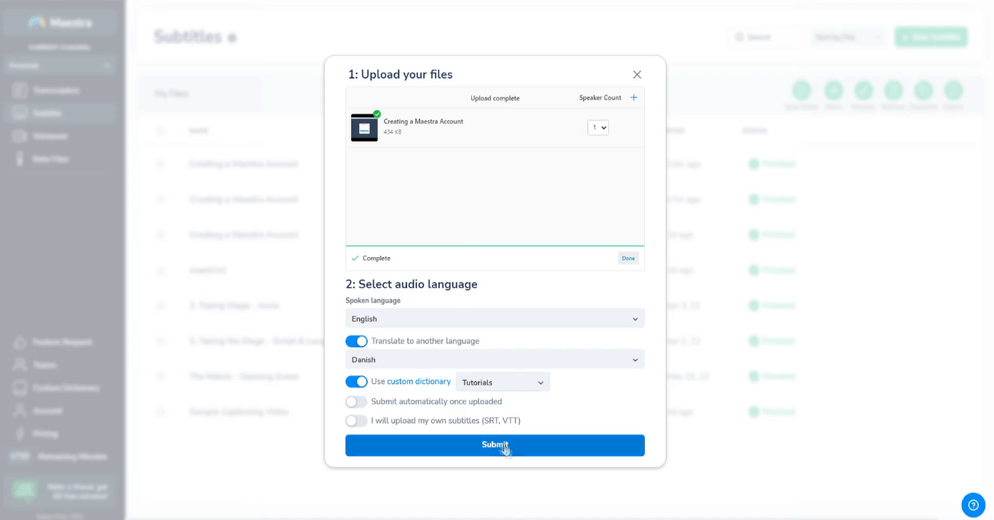
The file will begin being transcribed, this roughly takes around 20-30% of the duration of the file.
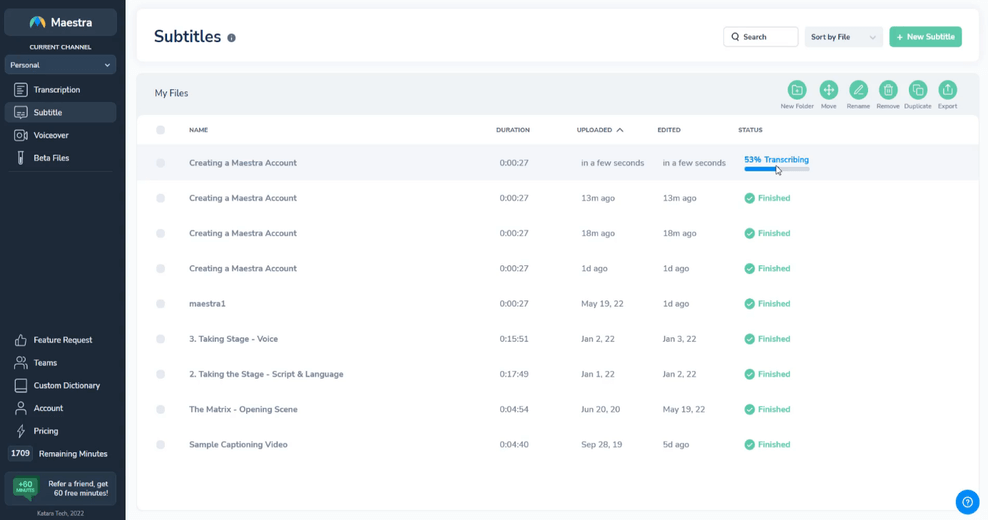
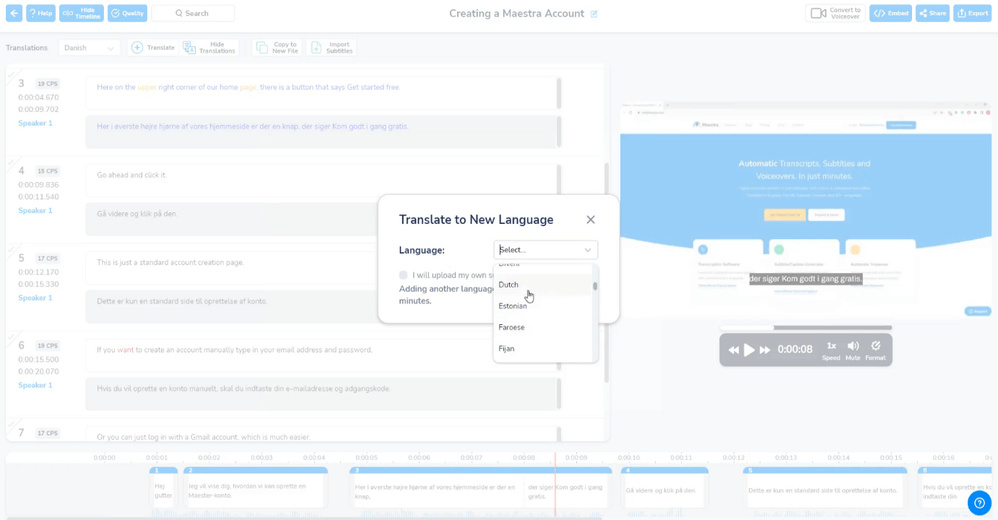
Click the file after the transcription is over. Once you are on the editing page, you can click "Translate" on the top left corner to generate subtitles in other languages.
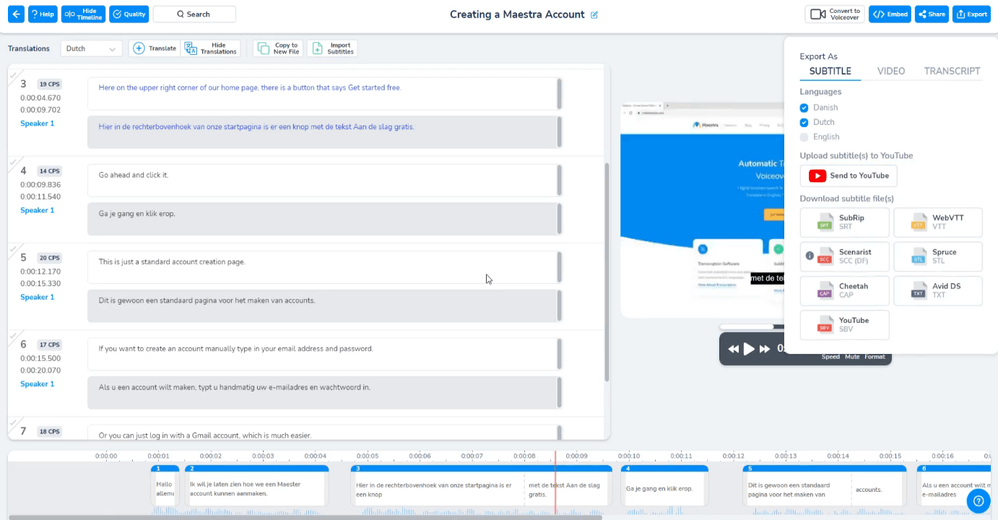
After everything is done, click "Export" and then click the button that is located under the text "Upload subtitle(s) to YouTube". After this, a window will pop up and ask you to choose your YouTube channel. Once chosen, the "Send to YouTube" button will appear.
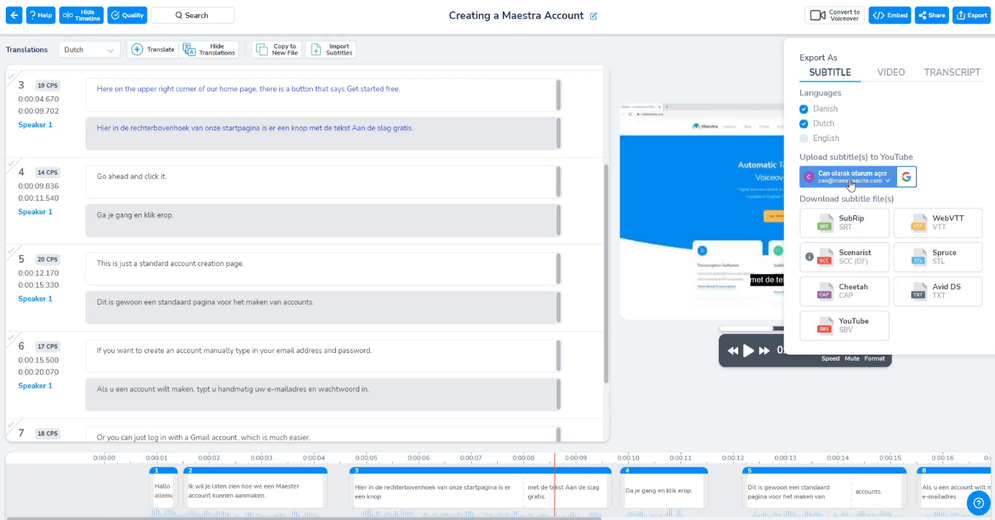
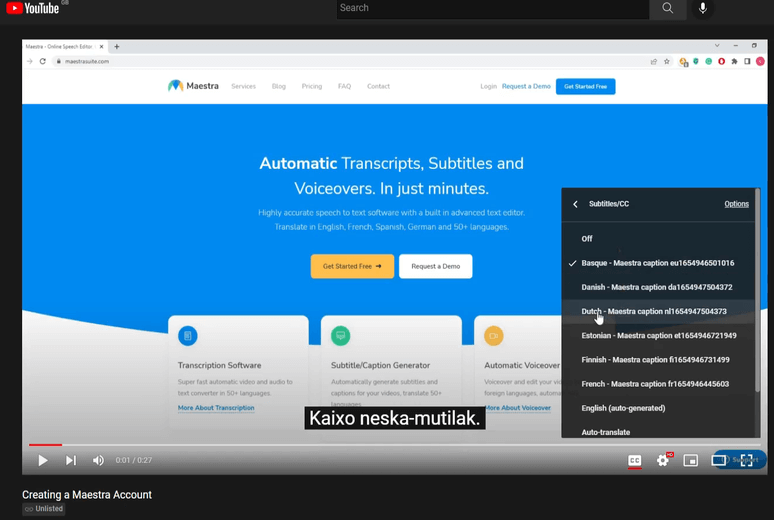
Choose which subtitles you want to add under the "Languages" tab, here I chose Danish and Dutch. Then click "Send to YouTube". Once successful, a window will appear that says "Captions were pushed to YouTube".
As you can see, the subtitles are now added to the YouTube video. Additionally, you can make any changes to the subtitles in Maestra's editor then click "Send to YouTube" again to apply the changes you have made to the YouTube video. If you have any more questions, click the "?" button on the lower right corner of the screen, which is our help button. Please note that Youtube videos over 30 minutes might have problems, and you should download these to your personal computer and upload directly instead.